Removing paint markings is achievable on diverse surfaces with the appropriate tools and techniques. The selection of the removal method relies upon the surface’s porosity.
Porous surfaces, such as wood or brick, can be effectively cleared with a solution of warm water and soap. On the other hand, non-porous surfaces, like metal or plastic, can be removed using rubbing alcohol or acetone.
This article will provide a comprehensive guide on the various techniques for removing paint markings from different surfaces. The guide includes a list of necessary materials, step-by-step instructions, and valuable tips to prevent surface damage.
How to Remove Paint Markings on Wood Surfaces?
If you have wooden surfaces in your home, such as doors, trim, or furniture, and you need to remove paint markings, it’s essential to do it right to avoid damaging the wood. Here’s a step-by-step guide on how to remove paint markings from wood surfaces:
Step 1: Collect the Required Materials
In order to ensure a seamless and effective paint removal process, it is important to gather all the necessary materials beforehand. These materials include rubber gloves, protective eyewear, a paint scraper or putty knife, fine-grit sandpaper, a clean, lint-free cloth, mineral spirits or paint thinner, mild dish soap, warm water, a soft-bristle brush, and wood stain or touch-up marker (optional), and varnish or sealant (optional).
Step 2: Use Protective Equipment
Prioritize your safety by donning rubber gloves and protective eyewear during the paint removal. It is crucial to take necessary precautions when dealing with chemicals and tools.
Step 3: Carefully Remove Excess Paint
Delicately remove any loose or excess paint from the wooden surface with a paint scraper or putty knife. Avoid applying excessive pressure to prevent damaging the wood.
Step 4: Eliminate Resistant Paint Using Mineral Spirits
If scraping alone proves insufficient to remove the paint markings, use a clean cloth that has been moistened with a small amount of mineral spirits or paint thinner. Apply gentle circular motions to the affected area to dissolve and lift the paint. To avoid damaging the wood, be careful not to apply excessive pressure.
Step 5: Clean the Area with a Soft-Bristle Brush
For stubborn paint markings, use a soft-bristle brush that has been dampened with mineral spirits or paint thinner to scrub the area using circular motions gently. This will help to loosen further and remove the paint. Be cautious not to scrub too hard, which may damage the wood.
Step 6: Surface Cleaning with Soapy Water
To effectively clean the wood surface, prepare a solution of mild dish soap and warm water in a bucket or bowl. Dip a clean cloth or sponge into the soapy water, wringing out excess moisture, and use it to wipe down the wood surface. This step is essential for removing residue from mineral spirits or paint thinner. Rinse the cloth frequently and change the water if it becomes dirty.
Step 7: Drying the Wood Surface
After cleaning, allow the wood surface to dry completely. Depending on the temperature and humidity, this process may take several hours. It is imperative to ensure that the wood is thoroughly dry before proceeding to the next steps.
Step 8: Sand the Affected Area if Needed
After removing the paint markings, inspect the area thoroughly. If the wood appears faded or discolored, use fine-grit sandpaper to sand the affected area gently. Sand in the direction of the wood grain until the color and texture blend with the surrounding wood.
Step 9: Eliminate Sanding Residue
After the sanding process, remove any remaining sanding residue with a clean, dry cloth. This guarantees a clean surface for additional treatment or finishing.
Step 10: Application of Wood Stain or Touch-Up Marker (Optional)
In the event that the removal of paint from the wood surface has resulted in an apparent variation in color, you may opt to use a wood stain or touch-up marker that matches the original color of the wood—applying the aforementioned stain or touch-up marker to the affected area and blending it uniformly with the surrounding wood surface using a clean cloth or a small brush.
Step 11: Apply Varnish or Sealant (Optional)
If you wish to protect the wood surface and achieve a uniform finish, you may apply a layer of varnish or sealant. To do this, use a brush or cloth to apply the varnish in long, even strokes, following the manufacturer’s instructions. Ensure that the varnish is completely dry before using or handling the wood surface.
How to Remove Paint Markings on Metal Surfaces?
Removing paint markings from metal surfaces can be challenging, especially if the metal is sensitive to scratching or corrosion. Here’s how to remove paint markings from metal surfaces without causing damage:
Step 1: Collect the Necessary Materials
To begin the process of paint removal, it is important to gather all the necessary materials beforehand. This may include rubber gloves, protective eyewear, paint scraper or putty knife, fine-grit sandpaper, clean lint-free cloth, mineral spirits or paint thinner, metal-safe paint stripper, wire brush or steel wool, mild detergent, warm water, and metal primer or paint (if needed).
Step 2: Use Protective Equipment
Prioritize safety by wearing rubber gloves and protective eyewear throughout the process of paint removal. This will help protect your hands and eyes from potential harm while working with chemicals and tools.
Step 3: Remove Loose Paint
To begin with, employ a paint scraper or putty knife to carefully remove any loose or peeling paint from the metal surface. It is essential to exercise caution and avoid exerting too much pressure to prevent damaging the metal.
Step 4: Apply Safe Paint Stripper for Metal
If scraping does not remove all the paint markings, use a metal-safe paint stripper per the manufacturer’s instructions. Evenly apply the paint stripper over the affected area with a brush or cloth. Allow the stripper to sit for the recommended time to soften and dissolve the paint.
Step 5: Remove Softened Paint with a Scraper or Brush
Once the paint stripper has had adequate time to work, carefully use a scraper or brush to remove the softened paint gently. You should work in small sections and apply light pressure to avoid any potential damage to the metal. If necessary, repeat the process until all of the paint is removed.
Step 6: Use a Wire Brush or Steel Wool for Stubborn Areas
For any stubborn paint markings, a wire brush or steel wool can be used to scrub the metal surface. This will assist in loosening and removing any remaining paint. It is important to proceed cautiously to avoid scratches on the metal surface.
Step 7: Clean the Surface with Mild Detergent and Warm Water
To clean the metal surface effectively, prepare a mild detergent solution and warm water in a bucket or bowl. Dip a clean cloth or sponge into the soapy water to wring out any excess moisture. Use a cloth or sponge to wipe down the metal surface, removing any residue from the paint stripper or loosened paint. Rinse the cloth or sponge frequently and change the water if it becomes dirty.
Step 8: Rinse and Dry the Metal Surface
Upon completion of the cleaning process, it is recommended to rinse the metal surface with clean water to remove any residual soap effectively. It is crucial to thoroughly dry the surface using a clean and lint-free cloth to prevent any potential moisture-related complications, such as corrosion.
Step 9: Surface Sanding (if necessary)
Carefully examine the metal surface for any rough or uneven areas. If such areas exist, use fine-grit sandpaper to sand them down gently. This step is critical in achieving a smooth, flawless surface for painting or finishing, mainly if there are remnants of paint or rough patches.
Step 10: Primer and Painting Application (if desired)
If you intend to paint the metal surface, apply a suitable metal primer in accordance with the manufacturer’s instructions. After the primer has dried completely, apply a layer of paint specifically designed for metal surfaces. Adhere to the paint can instructions for the best application and drying times.
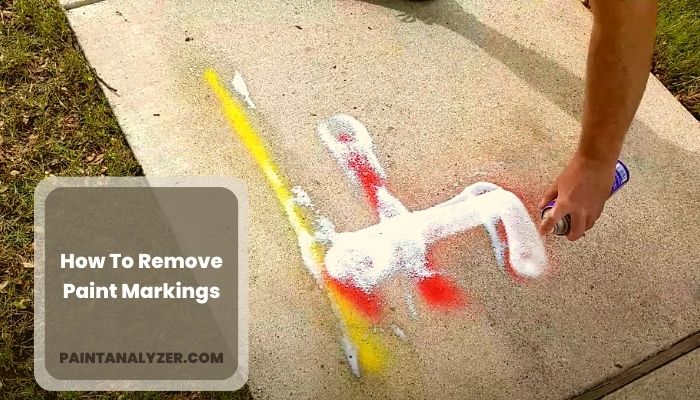
How to Remove Paint Markings on Concrete Surfaces?
Concrete surfaces are commonly found in garages, driveways, and sidewalks. They can also become victims of paint markings, especially if you’re working on a DIY project or home improvement task. Here’s how to remove paint markings from concrete surfaces:
Step 1: Gather the Necessary Materials
Before initiating the paint removal process, gathering all the required materials is imperative. The list of essential items may include rubber gloves, protective eyewear, paint scraper or putty knife, wire brush or stiff-bristle brush, pressure washer or hose, paint stripper or concrete cleaner, clean lint-free cloth, and concrete sealant or paint (if desired).
Step 2: Wear Protective Gear
Always prioritize safety when working with chemicals and tools. Wear rubber gloves and protective eyewear to safeguard your hands and eyes during the paint removal.
Step 3: Remove Loose Paint
In order to effectively remove paint from a concrete surface, it is necessary to utilize a paint scraper or putty knife to scrape off any loose or peeling paint gently. It is important to exercise caution and avoid applying excessive pressure to prevent concrete damage.
Step 4: Employ a Wire Brush or Stiff-Bristle Brush
For particularly resilient paint markings, it is recommended to employ a wire brush or stiff-bristle brush to scrub the concrete surface. Firm pressure should be applied in a back-and-forth motion in order to loosen and dislodge the paint. This process may require additional effort, mainly when dealing with older or thicker layers of paint.
Step 5: Cleanse the Concrete Surface
Once the scrubbing process is complete, rinse the concrete surface with a high-pressure washer or hose to eliminate any loose paint particles. This helps to remove the paint effectively. If a pressure washer is used, it is important to adhere to the manufacturer’s instructions and maintain a safe distance from the surface to avoid any damage.
Step 6: Apply Paint Stripper or Concrete Cleaner
If there are still any remnants of paint markings, it is recommended to apply a paint stripper or concrete cleaner that is specifically designed for the removal of paint from concrete surfaces. Following the manufacturer’s instructions for its application is essential, ensuring proper ventilation and protective measures. It is also advisable to allow the stripper or cleaner to sit for the recommended duration to soften and dissolve the paint residue effectively.
Step 7: Scrub the Surface
Once the paint stripper or concrete cleaner has had sufficient time to act, use a suitable brush to scrub the surface, focusing on areas with stubborn or deeply embedded paint. This will help to loosen further and remove the paint.
Step 8: Rinse and Repeat as Needed
After scrubbing, rinse the concrete surface thoroughly with clean water to eliminate any residue from the paint stripper or concrete cleaner. If any paint markings still remain, repeat the process of applying the paint stripper or cleaner, followed by scrubbing, until all paint has been fully removed.
Step 9: Allow the Surface to Dry
Once the paint removal process is complete, allowing the concrete surface to dry entirely is vital. The duration of this process may vary, depending on the weather conditions and the porosity of the concrete. It may take several hours or longer for the surface to dry completely.
Step 10: Apply Concrete Sealant or Paint (Optional)
An optional step is to apply a concrete sealant or paint to protect and enhance the appearance of the concrete surface. Following the manufacturer’s instructions for the specific product is recommended. Before application, ensure the surface is clean and dry to achieve the best results.
What is the Best Method for Removing Paint Markings from a Car’s Paint-Free Surfaces?
When it comes to removing paint markings from a car’s paint-free surfaces, the best method is to carefully use a specialized solvent or cleaner that is safe for the material. Gently smooth out touchup paint with a microfiber cloth to prevent damaging the surface. Always test in a small, inconspicuous area first.
How to Remove Paint Markings on Fabric Surfaces?
Paint markings on fabric surfaces can be a frustrating and unsightly problem. But fear not; there are several methods to remove paint markings from fabric surfaces, depending on the type of paint and fabric. Here are a few ways to try:
Step 1: Act Quickly
In the event that the paint is still wet, it is essential to act quickly by gently blotting the paint with a clean cloth or paper towel. Refusing to rub or spread the paint further into the fabric is advised.
Step 2: Remove Dried Paint
If the paint has already dried, it is recommended to carefully use a dull knife or spoon to scrape off as much of the dried paint as possible. It is crucial to handle the process gently to prevent any damage to the fabric fibers.
Step 3: Determine the Type of Paint
It is crucial to identify the type of paint used as the removal method may differ. Water-based paints, such as acrylic or latex, require different removal techniques than oil-based paints. We recommend referring to the paint can or manufacturer’s instructions for guidance.
Step 4: Conduct a Small Test
To avoid any damage or discoloration, it is advisable to test the cleaning solution or method on a small and inconspicuous area of the fabric before attempting to remove the paint from a visible area.
Step 5: Blot the Stain with a Clean Cloth
For water-based paints, dampening a clean cloth with warm water and gently blot the paint stain is recommended. It is important to avoid rubbing the stain, as it can potentially spread the paint further. Blotting should be done from the outer edges towards the center of the stain to prevent it from spreading.
Step 6: Use a Dish Soap Solution
If the warm water alone does not remove the paint, you can create a mild dish soap and warm water solution. Moisten a clean cloth with the solution and gently blot the paint stain. It is once again essential to blot from the outer edges towards the center of the stain.
Step 7: Rinse and Repeat
After applying the dish soap solution, rinse the fabric thoroughly with clean water to eliminate any soapy residue. Use a clean cloth to blot the area and absorb any excess moisture. If the paint stain persists, repeat steps 5 and 6 until the stain lightens or disappears.
Step 8: Treatment of Oil-Based Paints
The removal of oil-based paints is a more complex process. It is advisable to seek the assistance of a professional cleaner or adhere to the manufacturer’s guidelines for specialized paint removal products designed explicitly for oil-based paints.
Step 9: Wash the Fabric
Once the paint stain has been successfully removed or lightened, it is important to launder the fabric according to the care instructions. Use an appropriate laundry detergent and follow the recommended water temperature and washing cycle to ensure that any residual paint particles and cleaning solution are removed.
Step 10: Air Dry & Inspect
After washing, air dry the fabric or follow the recommended drying instructions. Once dry, inspect the fabric thoroughly to ensure the paint stain has been completely removed. If any traces of paint are left, it may be necessary to seek professional cleaning services or repeat the stain removal process.
How to Remove Paint Markings on Plastic Surfaces?
Paint markings on plastic surfaces can be particularly stubborn and difficult to remove. But with a little effort and the right tools, it’s possible to eliminate them. Here are a few steps to try:
Step 1: Collect the Necessary Materials
Collecting all the necessary materials is essential at the outset of the paint removal process. These may include rubber gloves, protective eyewear, a paint scraper or putty knife, fine-grit sandpaper, a clean, lint-free cloth, mild dish soap, warm water, rubbing alcohol, cotton balls or cloth, and a plastic-safe paint stripper (if required).
Step 2: Use Protective Gear
Prioritize safety by putting on rubber gloves and protective eyewear before removing paint. This is particularly important when working with chemicals and tools.
Step 3: Remove Loose Paint
Using a paint scraper or putty knife, gently remove any loose or peeling paint from the plastic surface. Apply just enough pressure to remove the paint without damaging the plastic.
Step 4: Surface Cleaning
Prepare a solution of mild dish soap and warm water in a bucket or bowl. Dip a clean cloth or sponge into the soapy water, wring out excess moisture, and use it to clean the plastic surface thoroughly. This step eliminates any dirt, debris, or loose paint particles. Rinse the cloth or sponge frequently and replace the water if it becomes dirty.
Step 5: Use Rubbing Alcohol
Dampen a cotton ball or cloth with rubbing alcohol and delicately blot the paint markings using small circular motions. This method can aid in dissolving and eliminating the paint. It is recommended to test the rubbing alcohol on a small, unnoticeable area first to ensure it does not cause any damage or discoloration to the plastic.
Step 6: Utilize Fine-Grit Sandpaper (if Necessary)
In cases where previous steps have yet to remove stubborn paint markings, fine-grit sandpaper may be used. Wet the sandpaper and then carefully sand the paint markings in a circular motion. It is essential to exercise caution and avoid applying too much pressure to prevent scratching the plastic. Rinse the area frequently to remove any sanding residue.
Step 7: Rinse and Dry the Plastic Surface
Following the cleaning or sanding process, it is recommended to rinse the plastic surface with clean water to eliminate any paint or cleaning product residue. A thorough drying process using a clean, lint-free cloth is necessary to prevent any water spots or damage to the plastic.
Step 8: Consider Using Plastic-Safe Paint Stripper (If Required)
If the paint markings persist despite your initial efforts, we recommend using a plastic-safe paint stripper. Following the manufacturer’s instructions carefully is essential, particularly in application techniques and safety precautions.
To use the paint stripper, apply it to the affected areas and allow it to sit for the recommended duration. Once the paint has softened, use a cloth or sponge to wipe it away, following the instructions provided by the manufacturer.
Step 9: Clean and Dry the Plastic Surface Again
Once you have utilized a paint stripper on the plastic surface, it is imperative to clean it thoroughly with mild dish soap and warm water. After rinsing the surface, ensure it is dry using a clean cloth.
Step 10: Consider Applying a Plastic Polish or Protectant (Optional)
To revive the shine and protect the plastic surface, you may use a plastic polish or protectant per the manufacturer’s instructions. Undertaking this step can enhance the visual appeal and promote the durability of the plastic.
Conclusion
Paint markings can be a frustrating and unsightly problem, but several methods exist to remove them from different surfaces. Whether it’s wood, metal, concrete, fabric, or plastic surfaces, the key is having the right tools and techniques to remove the paint markings safely and effectively.
Always test any cleaning solution on an inconspicuous area first to avoid damaging the surface, and be patient when removing paint markings to avoid causing further damage. If the surface is particularly delicate or valuable, seeking professional cleaning assistance’s always a good idea.
This article presents practical methods for removing paint markings from various surfaces professionally. In the event of an accidental paint spill, these tips and tricks can be referred to for quick and efficient removal. This guide makes achieving a clean and paint-free surface achievable in no time.