Having a car is a big responsibility that necessitates a lot of effort to keep it in good condition. Touching up any damaged paint with a matching color is one of the most essential maintenance tasks you can perform to keep your car looking good.
Using lacquer thinner, you can smooth out the touch-up paint and make it look more natural. Begin by cleaning and drying the area, then use a cotton swab to apply a small amount of solvent and gently rub the glob of paint away. You can also use Paint Thinner, a toothpick, and sandpaper.
This guide will walk you through the steps to smooth out the touch-up paint on your car. Continue reading to learn more about the process and how to achieve the best results.
How to Smooth Out Touch-Up Paint on Car?
If you’ve recently touched a spot on your car with touch-up paint, you may wonder how to get a smooth, professional-looking finish. You can achieve a flawless finish with lacquer thinner with suitable materials and patience. Here’s how:
Step 1: Clean the Surface
Before beginning, it is essential to ensure the surface is completely clean. This means washing the car thoroughly, using soap suitable for vehicles and a cloth or sponge to scrub away any dirt. This will improve the adhesion of the touch-up paint, ensuring better results.
Step 2: Wet Sand
Wet sand the area you will touch up with 1500–3000-grit sandpaper. It is important to use a finer grit to create a smooth surface for the paint to adhere to. When wet sanding, be sure the surface stays wet using a spray bottle or dripping water on it periodically.
Use a light amount of pressure, and be sure to sand in the direction of the grain. This is important to ensure a uniform finish in the end. When finished, take a clean cloth and wipe away any dust or residue created during the sanding process.
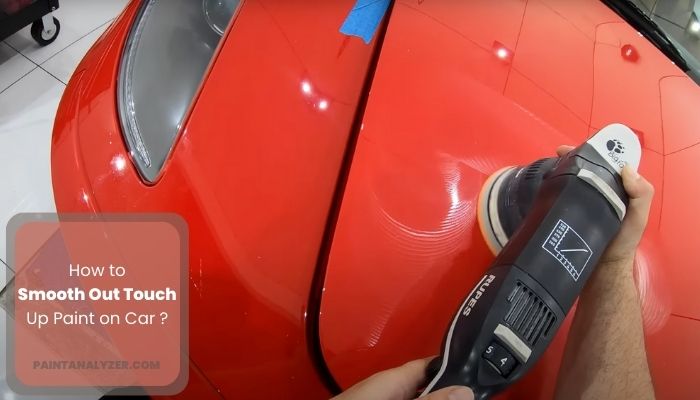
Step 3: Paint Emendation
After the wet sanding area, use a rubbing compound to ensure that any imperfections and irregularities have been removed. Rubbing compounds will also help to improve the overall look and finish of the paint by helping to smooth out any rough patches. Use the rubbing compound in a circular motion and avoid applying too much pressure.
Step 4: Ceramic Coating OR Wax
At this point, you can decide whether or not a ceramic coating or wax will be the most beneficial for your paint job. Applying wax or ceramic coating can help protect the paint from UV rays and other environmental factors, depending on your paint type.
Both ceramics and waxes have unique benefits; waxes are great at providing a glossy finish and resisting water, while ceramic coatings provide more of a durable finish with added protection. Whichever you decide, applying the wax or ceramic coating to the area that was just touched up is a great way to extend the life of your paint job.
Step 5: Estimate results
Once you are finished applying the wax or ceramic coating, it is crucial to evaluate the results. Take a few moments to inspect the surface and ensure the coating looks even and is not streaky or patchy. You can move on to the next step if the results are satisfactory and meet the desired requirements.
Step 6: Repeat
If you are not pleased with the outcome, it may be necessary to repeat Steps 4 and 5. Make sure to use the same amount of product and apply it in the same manner as before to ensure consistent results.
How Long Should You Wait Before Waxing or Sealing the Touch-up Paint on A Car?
It’s necessary to allow the touch-up paint to dry completely before waxing or sealing it. The drying time will depend on the type of paint and the ambient temperature and humidity. Generally, you should wait at least 24 hours before waxing or sealing the touch-up paint.
This will give the paint enough time to cure and harden. If unsure whether the paint is dry, you can perform a simple touch test by pressing your finger gently against the paint’s surface. If the paint is still soft or sticky, it is not yet ready to be waxed or sealed.
Can I Use the Touch-Up Paint Method to Fix Car Paint Chips on a Budget?
Yes, you can use the touch-up paint method to fix car paint chips on a budget. This DIY approach is a cost-effective solution for minor damage. By using a small brush, you can apply the paint directly to the chip, blending it in seamlessly and saving on car paint chip repair cost.
What Sandpaper Should You Use to Smooth Out Touch-up Paint on A Car?
When touching up paint on a car, selecting the correct type of sandpaper is essential. A good starting point for sanding is 1,500 grit. However, caution should be taken to ensure you don’t sand off too much. For best results, it is recommended that you use sandpaper with at least 2,000 grit.
After initially using the 2,000 grit sandpaper, you can move on to higher grits such as 2,500 and then finally 3,000. It is important to note that the higher the grit number, the finer the sandpaper and the smoother the finish. Ensure to adequately prepare the surface before sanding and take your time, as it can be easy to sand off too much paint.
How to Repair Car Scratches, Scrapes, and Chips with Touch-Up Paint
Conclusion
Smoothing out touch-up paint on your car is a process that requires patience and careful attention to detail to achieve a professional-looking result. It’s important to take the time to properly prepare the surface and sand it down with fine-grade sandpaper.
It is best to use light pressure to ensure that you don’t damage the car’s existing paint and that the new paint will bond correctly. Once the surface is properly sanded, it should be wiped with a clean, lint-free cloth to remove dust particles.
After this, you should wait at least 24 hours before waxing or sealing the touch-up paint for the best protection and a lasting finish. This process can help you achieve a professional-looking result and provide a great-looking finish for your car.
