If you want to update the look of your walls and ceilings, consider applying a skim coat. A thin layer of joint compound or drywall mud smooths out minor blemishes and imperfections on a wall or ceiling. This can also refresh the appearance of a wall. However, Can a skim coat be applied over the paint?
Yes, you can. To help the new layer of plaster adhere better, sand the surface you want to skim coat. Then, apply a thin layer of joint compound over the area you want to skim coat.
Before allowing it to dry completely, smooth it out as much as possible. Once dry, lightly sand the surface to create a smooth surface for later painting or wallpapering.
This guide will walk you through the process of applying it over paint, so keep reading to get started!
Skim Coating over painted surfaces: A step-by-step guide
Skim coating is a great way to give your painted surfaces a fresh, smooth look. It’s a relatively easy process that can be completed in just a few hours, and it’s well worth the effort. Here’s a step-by-step guide to applying skim coat over painted surfaces.
Step 1: Start by cleaning the surface
Before you begin the skim coating process, you must ensure the surface is clean and free of dirt or debris. Use a damp cloth or sponge to wipe down the wall and remove dirt or dust.
Step 2: Prepare the wall for skim coating
You’ll need to sand the wall to ensure it’s free of bumps or imperfections. Use medium-grit sandpaper and sand the wall in a circular motion until it’s smooth.
Step 3: Mix the skim coat
To make the mixture, combine a scoop of joint drywall compound with a cup of water in a mixing bucket, using a drill and paddle mixer to ensure the ingredients are properly combined. Mix until the mixture forms a thick paste that can easily be spread across the wall surface.
Depending on the temperature of the room and the desired consistency, you may need to adjust the amount of joint compound or water in the mixture. Make sure you mix only as much skim coat as you need to avoid any waste.
Step 4: Apply the skim coat
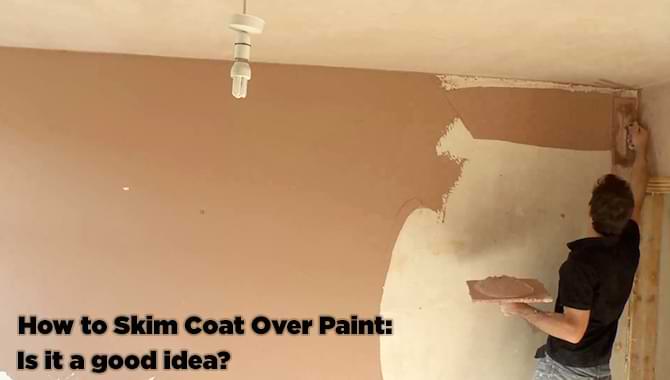
When applying the skim coat over the painted surface, it is important to use a trowel. Beginning at the bottom, apply a thin coat layer and use the trowel to even out the layer.
Continue this process until the entire surface has been covered, ensuring that the coat is applied in even, thin layers. It is essential to take time when applying the skim coat to avoid inconsistencies. Allow the skim coat to dry completely before proceeding to the next step.
Step 5: Allow the skim coat to dry
Allow the skim coat to dry until completely dry to the touch. Depending on the environment, this could take anywhere from several hours to a day or two for the skim coat to dry completely.
When the skim coat is dry, check the surface for irregularities and, if necessary, apply a second coat. Sometimes, a third coat may be needed to achieve the desired texture. Use a consistent technique and pressure when applying the skim coat to ensure uniform coverage.
Do You Need to Prime Painted Walls Before Skim Coating?
If you plan to skim-coat a wall, you’ll want to ensure the surface is properly primed. This will help the new layer of plaster or joint compound adhere better and create a smoother overall finish.
You can prime painted walls using either water- or oil-based primer. If the existing paint is in good condition, you can use a quick primer coat to prep the surface.
But if the paint is peeling or otherwise damaged, you’ll need to scrape it off and start with a new base coat. Once the primer is dry, you’re ready to start skim coating.
Is it possible to skim-coat over painted concrete?
Yes, it is possible to skim-coat over painted concrete. However, it is important to ensure the paint is in good condition before applying a skim coat. If the paint is chipped, cracked, or worn away, it is best to remove it and start with a clean, bare surface.
The skim coat should be applied in multiple thin coats, allowing each layer to dry thoroughly before applying the next. Proper preparation is essential for obtaining a successful skim coat, as any imperfections in the surface will be amplified in the finished product.
Using the correct tools and materials when the skim coating is also necessary, ensuring the results are long-lasting and of the highest quality.
Is It Possible to Skim Coat Over a Clear Coat?
When considering skim coating over a clear coat, there are a few tips for painting over clear coat that can help achieve satisfactory results. Properly cleaning and sanding the clear coat surface is crucial for optimal adhesion. Applying a suitable primer before skim coating is also recommended to enhance the paint’s longevity. Additionally, using high-quality paints and following the manufacturer’s instructions can further ensure a smooth and durable finish.
Can You Skim Coat Over Raptor Liner Before Painting?
Can you achieve a smooth surface by painting over Raptor Liner? Skim coating is a viable solution. By applying a thin layer of joint compound or plaster over the Raptor Liner, you can create a smooth and even surface for painting. This process ensures that imperfections are concealed, resulting in a professional-looking finish.
Would Skim Coating Over Asbestos Tile Be Safe?
Skim coating over asbestos tile may not be safe, as it can disturb the asbestos fibers and lead to exposure. Painting over asbestos tile is not recommended due to the potential health risks associated with asbestos fibers. It’s best to consult with a professional to safely address asbestos-containing materials.
Can You Skim Coat Over Paint to Add Texture?
Achieving Texture on Painted Surfaces can be done by skimming a coat over the existing paint. This technique helps to add depth and dimension to a plain painted wall. By applying a thin layer of joint compound or plaster over the paint, you can create a textured effect that adds aesthetic appeal to any space.
How do you repair damaged paint before skim coating?
Before applying a skim coat, any damaged paint must be repaired. The best way to do this is to use a spackling compound to fill in cracks and holes. Ensure the spackling is completely dry before moving on to the next step.
You also need to sand down any rough areas with fine-grit sandpaper, ensuring feather out the edges. Once the area is smooth and the paint has firmly adhered to the wall, you should use a primer to ensure the skim coat will properly adhere to the wall.
Make sure the primer is completely dry before applying the skim coat. Following these steps will help ensure that the skim coat will adhere properly and the project will have a professional finish.
Conclusion
Skim coating is a great way to repair and upgrade painted surfaces in your home. It is a process that involves applying a thin layer of plaster to the wall to smooth out any imperfections.
If the surface is already painted, ensure it is in good condition before starting the skim coating process. This means that any old paint should be scraped off, and the surface should be cleaned thoroughly. If the surface is damaged, the surface should be repaired before beginning the skim coating process.
Once the surface is properly prepared, you can apply the plaster’s thin layer. Depending on the size of the wall and the number of imperfections you want to fix, you may need to apply more than one layer. Applying multiple layers will help to create a smoother, more finished look. Once the plaster has dried, you can paint the wall in the color of your choice.