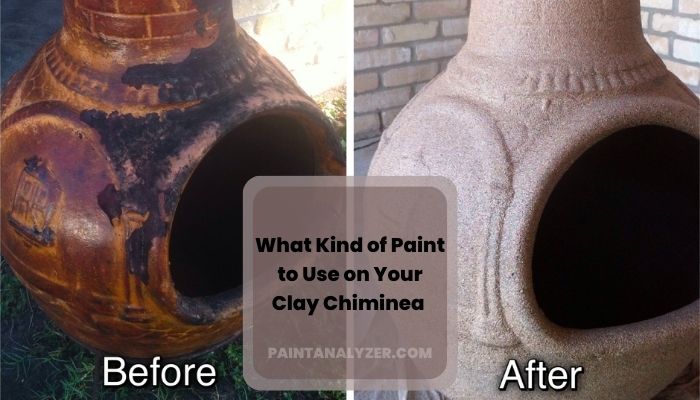
If you own a clay chiminea, you know how beautiful and functional these outdoor fireplaces can be. Even the most well-kept can begin to show its age and lose its luster over time. That’s where painting comes in! A fresh coat of paint can not only improve its appearance, but it can also provide additional protection against the elements.
Use high-temperature stove paint and outdoor ceramic paint to get the best results. Begin by cleaning the surface, repairing any damage, thoroughly drying the chiminea before you paint, and taping off the surrounding area. Finally, apply the paint sealant. Touch-up paint may also be required.
In this guide, I’ll explore the different types of paint suitable for use on a clay chiminea and the steps involved in prepping and painting it. So grab your paintbrush, and let’s get started!
Choosing the Right Paint for a Chiminea
When it comes to outdoor decorating, one of the most popular choices is a chiminea. The unique design of these outdoor fireplaces adds character and charm to any outdoor space.
But like any outdoor piece, you’ll want to ensure it’s properly maintained and cared for so it can bring you joy for years to come. One way to do this is to choose the right paint for your chiminea.
High-Temperature Stove Paint
Use high-temperature stove paint to paint a clay chiminea. This paint is specifically designed to withstand high temperatures and can be used on various surfaces, including metal, wood, and ceramics. It is available in various colors and can be applied with a brush, roller, or spray can.
One advantage of using high-temperature stove paint is that it is relatively inexpensive and easy to find at most hardware stores or online. However, it is important to note that this type of paint is not as durable as other options and may require touch-ups or reapplication more frequently.
Outdoor Ceramic Paint
Use outdoor ceramic paint to paint a clay chiminea. This paint is intended for ceramics and is more resistant to fading and peeling than regular paint. It comes in various colors and can be applied with a brush or a roller.
The use of outdoor ceramic paint has the advantage of being more durable and long-lasting than other options. It is, however, more expensive in general and may be more difficult to find in local stores.
Deciding Which Paint to Use
Ultimately, the best type of paint for your clay chiminea will depend on your personal preferences and budget. If you want a quick and easy solution that is relatively inexpensive, high-temperature stove paint may be the way to go.
However, outdoor ceramic paint may be worth the investment if you want a more durable and long-lasting finish.
preparation of the chiminea surface for painting
A chiminea is a decorative outdoor fireplace that is often used for entertaining. It is a great addition to any outdoor space, but over time, the surface of the chiminea can become dull and discolored.
To keep your chiminea looking its best, you should periodically repaint it. Before you can paint it, you need to prepare the surface to ensure that it adheres properly. Here are some tips for preparing it for painting.
Cleaning the Surface
Before you can begin painting your clay chiminea, it’s important to start with a clean surface. This will help the paint to adhere better and give you a more even and professional-looking finish.
To clean the chiminea, start using a stiff bristle brush to scrub away any dirt or debris accumulated on the surface. You may also want to use a mild detergent or clay pot cleaner to help remove any stains or discoloration.
Repairing Damage
If your chiminea has cracks or chips in the surface, it’s important to repair them before painting. This will help to ensure that the paint adheres properly and doesn’t peel off over time.
There are a few different ways to repair damage to a clay chiminea, including using a clay repair kit or patching the area with a mixture of water and ceramic repair compound.
Allowing the Chiminea to Dry Completely
Once you’ve cleaned and repaired the chiminea, allowing it to dry before painting is important. Depending on the humidity and temperature, this can take anywhere from a few hours to a few days.
To speed up the drying process, you can use a hairdryer or fan to blow air over the surface. Just be sure not to use too hot heat, as this could cause the clay to crack.
Sanding the surface (optional)
If you want to achieve an especially smooth and professional-looking finish, sand the chiminea’s surface before painting. This will aid in the removal of any bumps or imperfections, resulting in a more even surface for the paint to adhere to.
Use medium grit sandpaper and sand in the direction of the grain to avoid damaging the surface. Be sure to wipe away any dust or debris left behind by the sanding process before moving on to the next step.
How do you paint a chiminea? A step-by-step guide
Painting a chiminea can give it a new look and help protect it from the elements. If you want to paint it, here is a step-by-step guide to help you get the job done.
Step 1: Gather Your Materials
Before you begin painting your clay chiminea, gathering all the materials you will need is important. This may include paint, a paintbrush or roller, sandpaper (optional), a drop cloth or plastic sheeting, and any protective gear you want to wear (e.g., gloves, goggles).
Step 2: Protect the Surrounding Area
To make the painting process as easy and mess-free as possible, it’s a good idea to cover the surrounding area with a drop cloth or plastic sheeting. This will help to protect your patio or deck from drips or spills and make cleanup a breeze.
Step 3: Apply the Paint
Once you have all of your materials ready, it’s time to start painting! Begin by applying a thin, even layer of paint to the chiminea using a paintbrush or roller. If you are using a brush, be sure to load it with enough paint to cover the surface without leaving any drips or streaks. If you use a roller, apply the paint in a W-shaped pattern to ensure even coverage.
Step 4: Allow the Paint to Dry
After you have applied the paint, allow it to dry completely before applying a second coat. The drying time will depend on the type of paint you are using and the humidity and temperature of your location. Be sure to follow the manufacturer’s recommendations for drying times.
Step 5: Apply a Second Coat (optional)
If you want to achieve a more opaque and durable finish, you may want to apply a second coat of paint after the first coat has dried. Simply repeat the process of applying the paint and allowing it to dry, taking care to smooth out any drips or brush strokes.
Step 6: Sealing the Paint (optional)
After the paint on your clay chiminea has had a chance to cure fully, you may consider applying a sealant to help protect the surface.
A few different types of sealants are suitable for use on ceramics, including matte, gloss, and satin finishes. Apply the sealant according to the manufacturer’s instructions and allow it to dry completely before using the chiminea.
Step 7: Touch-Up Paint (optional)
Even with the best preparation and painting techniques, it’s possible that your clay chiminea may need touch-ups from time to time. To make this process easier, you may want to keep a small amount of the paint you used on hand for any necessary repairs.
Mix a small amount of the paint with a small amount of water to create a “slip,” or thinned paint, and use a small brush to apply it to any chips or scratches that may appear.
Can I Use the Same Paint for Both Clay Chimineas and Cement Pots?
Yes, you can use the same paint for both clay chimineas and cement planters. Make sure to choose a paint that is suitable for outdoor use and is designed to adhere to various surfaces. Applying a primer before painting can also help the paint adhere better to both clay and cement materials.
How to Care for a Painted Chiminea?
It’s important to follow a few simple maintenance steps to keep your painted clay chiminea looking its best. These could include:
- Wiping the surface with a damp cloth to remove any dust or dirt
- Applying touch-up paint as needed
- Sealing the paint with a protective coat every few years
- Avoiding placing the chiminea in direct sunlight or extreme weather conditions whenever possible
By following these simple steps, you can help ensure that your painted chiminea stays beautiful and well-maintained for years to come.
Are rust-oleum stoves and BBQ paint suitable for clay chimineas?
Rust-Oleum Stove And BBQ Paint are a great choice for giving your old stove or BBQ a facelift. With a wide range of shades, you can easily find the perfect hue to suit your kitchen or outdoor décor. Rust-Oleum products are formulated to resist corrosion, fading, and chipping, making them ideal for clay chimineas.
The range of colours available will help you achieve a professional finish on your chiminea, allowing you to enjoy its use for many years.
For best results, follow the manufacturer’s guidelines for application and take special care when using near-open flames.
Conclusion
Painting a clay chiminea is a simple and cost-effective way to rejuvenate the appearance and protect the surface of your outdoor fireplace. Following the steps outlined in this post, you can choose the right paint for your needs, prepare the chiminea for painting, and apply the paint for a professional-looking finish.
Don’t be afraid to experiment with different colors and finishes to find the right look. With a little effort and attention to detail, you can have a beautifully painted clay chiminea that you can enjoy for years to come.
