Painting a room or an entire space can be daunting, but having a perfect paint finish is essential to creating an aesthetically pleasing result. One of the most important techniques for achieving a perfect paint finish is maintaining a wet edge while painting
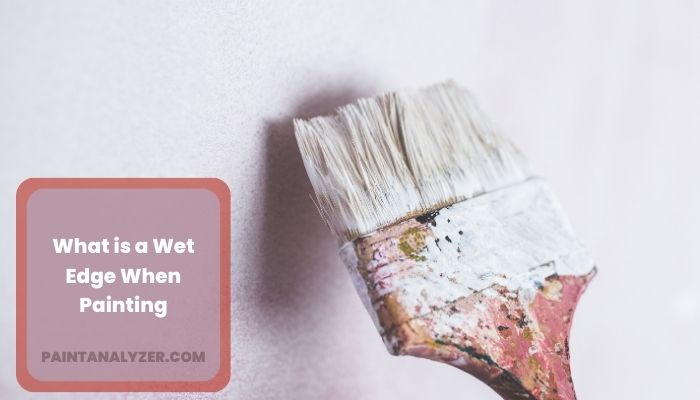
A wet edge when painting is the continuous area where damp paint is applied, ensuring uniform coverage without visible seams. This technique avoids overlapping and uneven surfaces when applying multiple strokes.
In this article, I’ll discuss the importance of wet edges when painting, how to achieve a wet edge, and how to maintain it while painting.
Understanding The Wet Edge
A wet edge is the area of the freshly painted surface that remains wet and blends with the newly applied paint. It is important when painting to achieve a wet edge as it prevents lap marks and uneven drying. A wet edge gives a smooth, professional look to the finished product.
Start at a corner to achieve a wet edge and paint in a straight line. Blend the newly applied paint into the previous one while it is wet. Use a paintbrush or a roller to maintain a wet edge.
Avoid taking a break in the middle of painting as it can cause the paint to dry and create overlapped areas. These tips will ensure a beautiful result that is sure to impress.
Factors That Affect The Wet Edge
Several factors can affect the wet edge and how effectively you can paint a surface. Maintaining a wet edge is important to avoid visible brush or roller marks, lap marks, and uneven paint coverage. Here are some key factors that can affect the wet edge:
Paint Type and Formulation
Different types of paint (e.g., latex, oil-based, water-based) have different drying times and characteristics. Some paints dry faster than others, affecting the wet edge. Read and follow the manufacturer’s recommendations for your specific paint.
Temperature and Humidity
Temperature and humidity can significantly impact paint drying times. High temperatures and low humidity levels tend to accelerate drying, potentially making it more challenging to maintain a wet edge. Conversely, cooler temperatures and higher humidity can slow down drying.
Ventilation
Adequate ventilation can help paint dry evenly and reduce the risk of drying too quickly. Good airflow can also help control humidity levels, which, as mentioned earlier, can affect drying times.
Paint Thickness
The thickness of the paint layer applied can affect drying times. Applying paint too thickly can result in a longer drying time, increasing the chances of developing lap marks.
Painting Technique
Your painting technique can significantly impact maintaining a wet edge. Avoid overworking the paint, which can lead to premature drying. Use long, smooth strokes with brushes or rollers, and try to keep a wet edge by working in sections that overlap slightly.
Surface Preparation
Properly preparing the surface before painting is crucial. Clean, smooth, and primed surfaces tend to hold paint better and allow for smoother application, which can help maintain a wet edge.
Use of Extenders
Paint extenders or retarders are additives that can be mixed with paint to slow drying. These can be useful in hot and dry conditions or when you need more time to work with the paint.
Brush or Roller Type
The brush or roller you use can impact the wet edge. High-quality brushes and rollers designed for the specific type of paint you’re using can provide better control and help maintain a wet edge.
Overlap Technique
When applying paint in sections, it’s essential to overlap each section slightly with the previous one. This ensures a seamless finish without visible lap marks.
Experience and Skill
Practice and experience in painting techniques can significantly improve your ability to maintain a wet edge. Learning how to time your strokes and manage the paint’s consistency is crucial.
Techniques For Maintaining A Wet Edge
Maintaining a wet edge is critical to achieve a smooth and uniform finish. With brush techniques, avoid overloading your brush and drag tinted paint across previously painted or unpainted areas. Always dry your brush with a rag before returning it to the paint.
When using a roller, don’t press too hard or go back over an area where the paint is beginning to dry. Spraying techniques require back-brushing to keep the wet edge consistent. Some tips for consistent wet edges include planning your painting pattern and working in small sections, ensuring the paint doesn’t have time to dry.
With these techniques in mind, you can achieve a professional-looking finish on all of your painting projects.
Advantages of A Wet Edge In Painting
Maintaining a wet edge while painting offers several advantages that contribute to achieving a professional and aesthetically pleasing finish. Here are some of the key advantages of maintaining a wet edge in painting:
Uniform Finish
A wet edge allows for a more even and uniform paint application across the surface. This results in a consistent color and texture, reducing the likelihood of visible streaks or variations in the paint’s appearance.
Minimized Lap Marks
Lap marks occur when wet paint is applied over partially dried paint, creating visible lines or ridges. By keeping a wet edge, you can prevent lap marks, ensuring seamless transitions between painted sections.
Better Blending
Maintaining a wet edge enables better blending between adjacent areas when working with multiple paint colors or shades. This is particularly important for creating smooth gradients or transitions in faux finishes or decorative painting.
Reduced Brush and Roller Marks
Wet edges help minimize the appearance of brush or roller marks on the painted surface. When the paint is still wet, feathering any strokes or marks is easier, resulting in a smoother finish.
Extended Working Time
Keeping a wet edge allows you more time to work with the paint, especially in larger or more complex projects. This extended working time is beneficial for maintaining control over the application and ensuring a consistent appearance.
Enhanced Coverage
A wet edge helps ensure the paint adheres well to the surface, maximizing coverage and reducing the need for multiple coats. This can save time and paint.
Professional-Looking Results
Maintaining a wet edge is a hallmark of professional painting, whether you’re painting walls, ceilings, trim, or other surfaces. It can make your paint job look more polished and well-executed.
Time Savings
While it may seem counterintuitive, maintaining a wet edge can save time in the long run. You can complete the project more efficiently when you avoid having to go back and fix lap marks or uneven areas.
Reduced Paint Waste
Achieving a uniform finish with a wet edge means you’re less likely to have to touch up or redo sections of your work. This can help reduce paint wastage and save on materials.
Enhanced Durability
An adequately applied paint job with a maintained wet edge is more likely to be durable and long-lasting. The paint adheres better to the surface, reducing the risk of peeling or chipping over time.
Is Butyl Caulking Sealant Useful for Achieving a Wet Edge When Painting?
When it comes to achieving a wet edge while painting, butyl caulking sealant explained. This type of sealant is useful for creating a smooth transition between painted and unpainted areas, allowing for a seamless finish. Its water-resistant properties make it ideal for maintaining a wet edge and preventing drying lines.
Common Mistakes When Achieving A Wet Edge
Achieving a wet edge when painting is essential to creating a smooth, flawless finish. However, painters make common mistakes that can undermine their efforts. Here are some of the most frequent errors to avoid:
Overworking the Brush or Roller
Overworking the brush or roller can lead to streaks and an uneven finish. Excessive back-and-forth strokes or rolling over already-drying paint can disturb the wet edge, making it difficult to maintain a consistent appearance.
Painting in Direct Sunlight
Painting in direct sunlight can cause the paint to dry too quickly, especially in hot conditions. This rapid drying can create an uneven surface with visible lap marks and brush or roller lines. Choosing a time of day or location with diffused light is best to ensure proper drying and wet edge maintenance.
Applying Too Much Pressure
Applying too much pressure with the brush or roller can cause the paint to be pushed around, leading to inconsistencies in coverage and texture. Use gentle and even pressure to avoid disrupting the wet edge and achieve a smoother finish.
Using the Wrong Type of Paint
Using the wrong paint for the surface or project can lead to a poor finish. Different paints have different drying times and characteristics, so selecting the appropriate paint for the job is essential. Always follow the manufacturer’s recommendations for the specific paint you are using.
Conclusion
As a careful painter, you must have observed that the wet edge technique is crucial for a perfect painting. Applying wet paint over dry paint will leave visible brush marks and uneven surfaces on your project. However, you can create a seamless and smooth finish by ensuring a consistent wet edge.
Remember to follow the proper painting techniques, such as moving the brush in the same direction and maintaining a wet edge at all times, using a paint extender to complement the working time, and keeping a damp rag handy to clean off excess paint.
By mastering the wet edge technique, you can avoid many common painting errors like lap marks, sags, and brush marks, and your paint job will have a professional finish. Therefore, always maintain a wet edge to achieve an even surface and an immaculate paint job.
