When it comes to painting a car, many steps need to be taken to achieve a professional and long-lasting finish. One of the most important steps in this process is applying primer to the car’s surface.
Yes, sanding primer before painting car would be best. It provides a key step in creating a smooth surface that paint can grip. It also helps eliminate any imperfections in the primer coat itself.
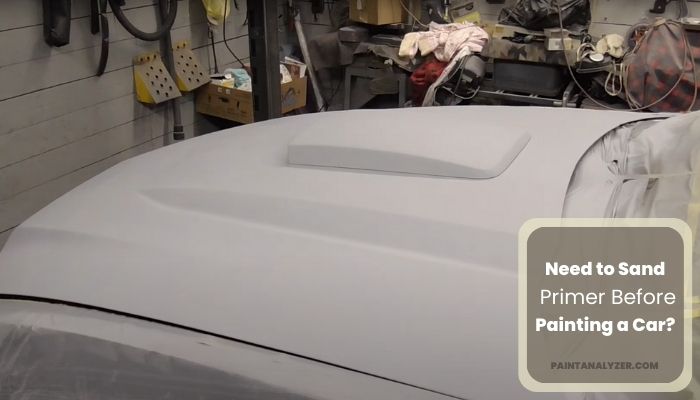
Before painting your car, make sure it has a smooth surface. Sand any rough spots and scrape away any old paint or primer. Otherwise, your new paint job will look dreadful.
The good news is that you don’t have to sand the whole thing down. Just concentrate on the areas that are most likely to be noticed by others. The hood, trunk, and doors are examples. Also, sand is in the same direction as the metal’s grain. Otherwise, you’ll end up with more work. Continue reading to discover more!
Can You Paint Over Car Primer Without Sanding?
It is possible to paint over primer without sanding, but it is not recommended. Sanding provides a key for the new paint to grip onto and helps create a smooth surface. If you choose not to sand before painting over primer, ensure that the primer is completely dry and free of dust or dirt.
Additionally, you should use high-quality paint that is specially formulated to adhere to surfaces without sanding. For best results, use an oil-based paint for high-traffic areas, as it will provide a durable and long-lasting surface.
Also, apply multiple thin coats of paint instead of a single thick coat, and use a brush or roller specifically designed for oil-based paints.
What is the best way to sand primer before painting a car?
The best way to sand primer before painting a car is to use a dual-action sander. This type of sander combines a random orbital motion with a vibrating motion, which helps to create a smooth finish. It is also the most efficient way to sand the primer. Here is a step-by-step guide to sanding primer before painting car:
Step 1: Choose the right sandpaper
When choosing the right sandpaper for your project, it is important to select the appropriate grit to ensure optimal results. The type of primer used should be considered when deciding on the best sandpaper to use. Generally, grit between 180 and 320 is best suited to achieve the desired finish.
Step 2: Prep your workspace
Before beginning any project, it is essential to ensure that the workspace is adequately prepared. Ensure that the area is free from dust, dirt, and other debris, as these can interfere with the quality of the finished product. Use a damp cloth to wipe down the surface and remove any stubborn dirt.
Additionally, make sure that all necessary tools and materials are within easy reach, as this will save time and effort in the long run. Taking the time to prepare your workspace beforehand properly will result in a smoother and more successful project.
Step 3: Connect the sander to a vacuum
Vacuums are essential when sanding and should be used whenever possible to reduce the dust generated. Connecting the sander to a vacuum allows the user to take full advantage of the dust-reducing capabilities of the vacuum.
Additionally, connecting the sander to a vacuum will help to keep the work area cleaner and prevent the buildup of dust particles in the air and on surfaces. This will also help to ensure a healthier work environment.
Step 4: Begin sanding
Begin sanding the area using a circular motion, overlapping each stroke. Sanding the entire area evenly is important to ensure a smooth and consistent finish. Start with the lower grit sandpaper and gradually move to higher grits, depending on the desired finish.
Be sure to sand in the direction of the grain to avoid creating unwanted scratches. Additionally, it is important to avoid pressing too hard, as this can cause unnecessary damage to the material. Sanding is a key part of the process, so be sure to take your time and complete it properly.
Step 5: Change the sandpaper
Once you have finished sanding the area using the coarser grit, switch to a finer grit, such as 320-grit. This will provide an even smoother finish and help refine the surface for any other painting or finishing.
Take care when switching to the finer grit, as the smaller particles can cause more damage if the sandpaper is used too aggressively. Using the finer grit sandpaper in a gentler, more circular motion is recommended to ensure the best result.
Step 6: Check for smoothness
Check the surface for smoothness after thoroughly sanding the entire area. Assess the area with your hand, feeling for any bumps or ridges. If any remain, sand them away with a finer grit of sandpaper. This will result in a smooth, even surface.
Step 7: Clean the area
After sanding the entire area, use a vacuum or damp cloth to ensure that all dust and debris have been removed. This is a critical step in ensuring a smooth, professional finish.
Ensure the entire area has been vacuumed or wiped down with a damp cloth. Pay special attention to any corners or other difficult-to-reach areas.
What grit do you use to sand primer before painting a car?
When sanding a car primer before painting, it is important to thoroughly remove any rust or surface damage before applying the new paint. The best method is, to begin with 180-grit sandpaper, which will remove the rust and other surface damage.
Once the rust and other surface damage are fully removed, it is important to switch to 320-grit sandpaper to ensure the surface is smooth and ready for the new paint to adhere.
Sanding the paint all the way down to the bare metal, or at least to the original primer, is essential for the new paint to adhere properly and last for a long time. If the sanding process is not done correctly, the new paint will not adhere properly and may not last as long.
Will Rain Damage the Primer on a Car Before Painting?
Yes, painting a deck in rainy weather can definitely damage the primer on a car. Rain can cause the primer to bubble, peel, or not adhere properly to the car’s surface. It’s important to wait for dry, sunny weather before applying primer and paint to ensure a successful and long-lasting finish.
Do You Wet Sand Primer Before Painting?
It is critical to wet sand the primer before painting a car. Wet sanding the primer before painting helps to create a smooth surface for the paint to adhere to, reducing the chances of any imperfections arising from an uneven surface.
It also helps remove any dust or debris on the surface, resulting in a better finish. When wet sanding, use the correct grade of sandpaper and a water and soap solution to ensure the surface is sufficiently lubricated.
Furthermore, ensuring the area is properly dried before the painting begins is important for the best results.
Conclusion
Sanding primer before paint is necessary. For best results, medium grit sandpaper is recommended. Wet sanding is another option to consider when preparing the vehicle for painting. Finally, the decision will be based on the specific car and the desired outcome.
When prepping and painting a car, always wear the necessary safety equipment. Anyone can achieve a great finish on their vehicle with the right tools and knowledge. Thank you for your time!