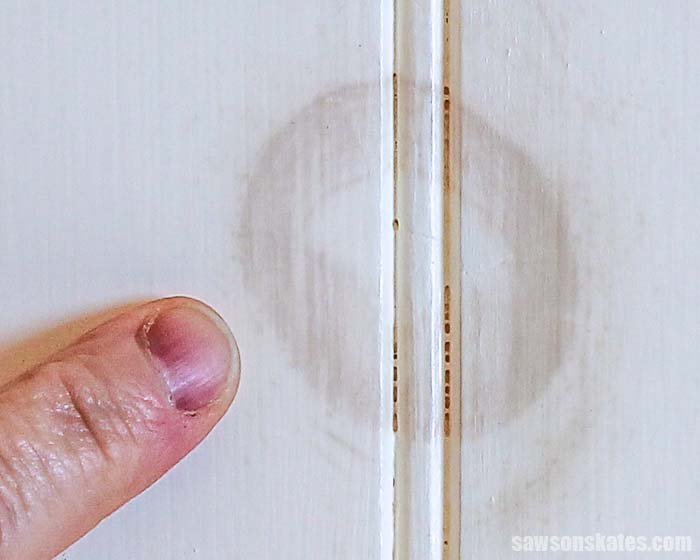
Knots bleeding through paint is a common problem faced by homeowners and DIYers. They are natural imperfections found in wood, and when they are not adequately sealed or treated before painting, they can release resin which can bleed through the paint and create unsightly stains.
There are several approaches for avoiding and resolving knots that bleed through paint, and the ideal solution for you will depend on the particular details of your project. These methods may include sanding the knots, applying a sealant or primer, applying multiple coats of paint, and using paint with a higher resin content.
In this article, I’ll dive deep into the solutions you can use to prevent and fix knots bleeding through the paint. So keep reading!
An Expert Guide to Stopping Knots from Bleeding Through Paint
Different prevention methods can be used to stop knots from bleeding through the paint. Now I will share a simple yet effective step-by-step guide for stopping knots from bleeding through the paint.
Tools and Materials
- Sandpaper (coarse and fine grit)
- Tack cloth
- Knot-blocking primer or sealant
- Paint (high-quality, with higher resin content)
- Paint brushes or rollers
- Drop cloths or plastic sheeting
Step 1: Preparation
- Start by removing any old paint or varnish from the surface of the wood.
- Use coarse grit sandpaper to rough up the surface of the knots and remove any loose fibers or debris.
- Wipe down the surface with a tack cloth to remove any dust or debris.
- Apply a knot-blocking primer or sealant to the knots and surrounding areas, following the manufacturer’s instructions.
- Allow the primer or sealant to dry completely.
Step 2: Painting
- Begin by painting the knots’ surface with high-quality paint with a higher resin content.
- Use a paintbrush or roller to apply the paint, and work it into the knots and surrounding areas.
- Allow the paint to dry completely before applying a second coat.
- Repeat the process with the second coat, applying it evenly and thoroughly.
- Allow the paint to dry completely before applying any additional coats if desired.
Step 3: Finishing
- Once the paint is completely dry, inspect the surface for any areas needing touch-ups or other paint.
- Clean your brushes and rollers with soap and water and let them dry.
- Dispose of the drop cloths or plastic sheeting properly.
- Enjoy your newly painted surface that is knot-free!
What are the Possible Causes of Knot Bleed?
Knot bleed is a common issue in fly fishing, and it can be caused by a number of different factors. Understanding why knot bleeding happens so you can avoid it in the future is essential.
Natural oils and resins
As mentioned, knots contain natural oils and resins that can bleed through paint. These oils and resins can cause the paint to blister or peel, ruining your project’s finished look. The natural oils and resins found in knots can also make it difficult for paint to adhere properly to the wood.
Improper preparation
Another cause of knot bleed is improper preparation before painting. If the wood surface is not cleaned or sanded correctly, the oils and resins from the knots can bleed through the paint.
Using low-quality paint
Using low-quality paint can also cause knots to bleed through. Low-quality paint may not have enough resin to create a barrier that keeps the oils and resins from bleeding through.
Applying too-thin coats
Applying paint too thinly can also cause knots to bleed through. When the paint is too thin, it can’t form a complete barrier around the knots, allowing the oils and resins to bleed.
Different types of prevention methods Knots Bleeding Through Paint
When you’re redecorating a room or updating a piece of furniture, the last thing you want is for your hard work to be undone by an unsightly knot. So, today I will discuss the various prevention methods available for preventing knots from bleeding through the paint.
Sanding the Knots
Sanding the knots before painting is one of the most effective methods for preventing bleeding. Using high-grit sandpaper, you can smooth out the surface of the knots and remove any oils or resins that may cause bleeding.
This will also help to create a better surface for the paint to adhere to. Sanding should be done before any other preparation, such as priming or sealing, as it will also remove these layers.
Applying a sealant or primer
A shellac-based primer is an effective solution for preventing knots from bleeding through the paint. This product penetrates the wood and forms a barrier to keep the oils and resins from staining the paint. Applying this primer when prepping the surface is essential to ensure optimal results.
Painting multiple coats
Painting multiple coats of paint can also help to prevent knot bleeding. By applying multiple coats, you can create a thicker, more complete barrier that keeps the oils and resins from bleeding. When painting multiple coats, you should allow each coat to dry completely before applying the next.
Using paint with higher resin content
Another option is to use paint with a higher resin content. Resin is a natural component of paint that helps it adhere to the wood surface and creates a barrier that keeps the oils and resins from bleeding.
Using paint with a higher resin content can create a more effective barrier that will keep the knots from bleeding through the paint.
Can a Paint Roller Slide affect the Bleeding of Knots through Paint?
When dealing with knots bleeding through paint, it’s important to address the paint roller sliding issue fix. Properly securing the roller frame to the handle can help ensure even application and prevent paint from pooling, which can exacerbate knot bleeding. It’s also essential to use a high-quality primer to seal the knots before painting.
Tips and Tricks
In order to achieve a successful paint job, it is recommended to keep in mind some tips and techniques to ensure that knots will not appear through the paint.
Use a high-quality paintbrush or roller
A high-quality paint brush or roller can help ensure that the paint is applied evenly and thoroughly, which is especially important when dealing with knots. They are less likely to leave streaks or brush marks, which can be especially noticeable on knots.
Allow the paint to dry completely between coats
It’s essential to allow the paint to dry completely between coats to ensure that it adheres properly and doesn’t bleed through. By allowing the paint to dry completely, you can also avoid creating bubbles or blisters that can ruin the finished look of your project.
Apply paint with a light touch
When painting over knots, apply the paint with a light touch. Overworking the paint can cause it to bleed through and ruin the finished look of your project. Instead, use a light touch and work the paint into the knots and surrounding areas.
Test the paint on a small area first
Before starting your project, it’s a good idea to test the paint on a small, inconspicuous area of the wood to ensure it doesn’t bleed through. This can help you to identify any issues before they become a problem.
Stopping Bleed Through and blocking knots from coming through
Conclusion
Knots can be a real pain when it comes to painting and can ruin the finished look of your project. You can take steps to prevent them from bleeding through. Sanding the knots, applying a sealant or primer, painting multiple coats, and using paint with a higher resin content are all effective ways to stop knot bleeding.
Additionally, by following the step-by-step guide, tips, and tricks outlined in this post, you can ensure that your finished project looks great and lasts for years. Remember to take your time, pay attention to detail, and consult a professional if unsure how to prevent knot bleeding.
Ultimately, remember that painting over knots requires more attention to detail. Still, with the proper preparation and techniques, you can achieve a professional-looking result. So, get your paint brushes and rollers ready, and let’s get that knot-free paint job done!
