Roller painting can be a great way to quickly and easily paint large surfaces, but it’s easy to end up with unsightly streaks if you’re not careful.
Before you begin painting with a roller, it is important to understand how to avoid streaks. With a little bit of prep work and the right technique, you can achieve a streak-free finish. To avoid streaks when painting with a roller, start by preparing the surface you will be painting. Make sure to sand any rough areas and remove any dust or debris and apply a primer to the surface. This will help to create an even surface for painting.
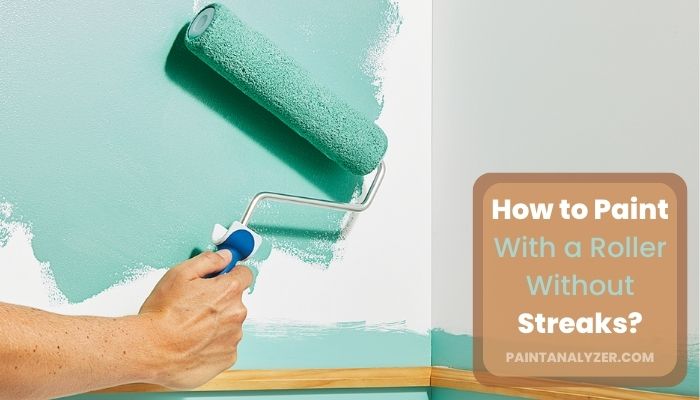
Painting with a roller is a lot easier than most people think. With a little bit of practice, you can get great results without any streaks.
How to Paint a Wall With a Roller for Beginners?
Whether you’re painting a accent wall or an entire room, rolling paint onto a wall is an easy way to get even coverage. If you want to achieve an even, consistent paint job without any streaks, follow these simple tips for using a roller.
Step 1: Cover Floors
Before you start, lay down drop cloths or plastic sheeting to protect your floor from paint drips.
Step 2: Use Painter’s Tape and primer
In order to get a streak-free paint job, it is important to apply primer before painting. This will help to create a smooth surface that the paint can adhere to. When choosing a primer, be sure to select one that is specifically designed for the type of paint you will be using. Then, tape off any baseboards or moldings with painter’s tape.
Step 3: Use Tray
Pour your paint into a roller tray and dip in a medium-nap roller (around 3/4 inch). Roll the wet roller up and down the inside of the tray to evenly load it with paint. Too much paint will cause dripping and streaking, while too little paint will make it difficult to achieve an even coverage.
Step 4: Put roller extension
Use a brush or a roller extension pole to apply paint to the edges and corners of the room. This will help you avoid leaving any bare spots.
Step 5: start painting
Now it’s time to start painting! Begin at the top corner of your wall and roll the paint on in long, even strokes. Work your way down the wall until you reach the bottom.
Step 6: Reload Roller Often
To avoid creating lap marks, keep a “wet edge” by reloading your roller often and overlapping each stroke by about 6 inches.
Step 7: Use multiple coats
Once you’ve finished painting the first section of wall, move on to the next one until the entire surface is covered. Always use multiple coats of paint to get a smoother finish. Be sure to overlap each stroke slightly to ensure a smooth, even finish.
Step 8: Dry completely
Apply the paint to the wall in even strokes, moving from top to bottom. Let your paint dry completely before removing the painter’s tape and moving furniture back into place.
How to Get Rid of Roller Marks When Painting?
Nothing ruins the look of a freshly painted wall more than ugly roller marks. Those unsightly streaks are caused by paint build-up on the roller, and they’re easy to avoid with a little preparation. Here’s how to get rid of roller marks when painting:
1. Start by thoroughly washing your roller in warm soapy water. This will remove any paint residue or dirt that could cause streaking.
2. Once your roller is clean, dip it in paint thinner and then roll it out onto a piece of old newspaper. This will help to evenly distribute the paint across the surface of the roller and prevent clumping.
3. When you’re ready to begin painting, roll the brush out onto the wall in long, even strokes. Make sure to overlap each stroke slightly to avoid leaving behind any bare spots.
4. As you work, periodically check your roller for any buildup of paint. If you see any clumps forming, simply dip the brush back in the paint thinner and continue rolling until the problem is resolved.
With these simple tips, you can say goodbye to those pesky roller marks once and for all!
How to Remove Roller Marks Without Repainting?
Are you painting your home and notice unsightly roller marks? Have you ever wondered how to remove roller marks without repainting? Well, wonder no more! Here are some tips on how to get rid of those pesky marks.
Finish Using Brush
When the paint is still wet, simply take a brush and lightly go over the area with the roller mark. This will usually do the trick and the mark will disappear.
Sand the surface and repaint
If the paint is dry, Start by taking a sanding block or sandpaper and gently sanding over the area with the roller mark. You don’t want to sand too hard or you could damage the paint.
Just enough to rough up the surface so that new paint will adhere better. Once you’ve lightly sanded the area, wipe it down with a damp cloth to remove any dust particles. Then, apply a fresh coat of paint following these same steps – using a brush first if necessary to cover any remaining roller marks.
How to Paint Dark Colors Without Streaks?
One of the best ways to paint dark colors without streaks is to use a quality painting primer. This will help to create an even surface for your paint to adhere to and also help to prevent any bleed-through from occurring.
When choosing a primer, be sure to select one that is specifically designed for use with dark colors.
Another helpful tip is to always start with a light coat of paint and then build up the color gradually. This will help you avoid any visible brush strokes or unevenness in the final finish. If necessary, you can always go back and add additional coats of paint until you achieve the desired opacity.
Finally, make sure that you allow each layer of paint ample time to dry completely before moving on to the next. If you try to rush things, it’s very likely that your streaks will become more pronounced as the wet paint tries to level itself out. Patience is key when painting with dark colors!
How Do You Paint With a Roller Without Getting Lines?
There are a few things you can do to avoid getting lines when painting with a roller. Make sure the surface you’re painting is smooth and even. Any bumps or irregularities will likely transfer onto your paint job.
Use a high-quality roller with a good Nap (the thickness of the fabric). A thicker roller will help to distribute the paint more evenly and prevent lines from forming.
Be careful not to overwork the paint; go over each section only once or twice for best results.
Why Do you Get Lines When Rolling Paint?
There are a few reasons why you might get lines when rolling paint.
The first is if the paint is old and has started to thicken. This can happen if the paint has been sitting in the can for a while or if it’s starting to go bad.
Another reason is if the surface you’re painting isn’t completely smooth. If there are bumps or imperfections, the paint will have a harder time flowing evenly and you’ll end up with lines.
It could just be that your painting technique isn’t great. If you’re not careful when rolling, you can end up leaving lines behind.
Whatever the reason, there are a few things you can do to try and avoid getting lines when painting.
Make sure you stir the paint well before using it. This will help ensure that it’s the right consistency and will flow evenly.
Roll slowly and steadily over the surface, being careful not to apply too much pressure. And finally, don’t be afraid to use a little bit of touch-up paint here and there to even out any lines that do appear.
How To Paint With a Roller to Avoid Roller Marks and Streaks – One Coat Tips
Can Mod Podge Affect the Outcome of Painting with a Roller?
Yes, painting over Mod Podge can affect the outcome of your project when using a roller. The Mod Podge can create a slick surface, causing the paint to bubble or not adhere properly. It’s best to lightly sand the Mod Podge before painting to ensure better adhesion and a smoother finish.
Conclusion
The roller is best suited for edges or lightly textured surfaces, while for walls and ceilings, you’ll want to use a brush. The roller is about twice the size of the brush. Start rolling, not brushing, in long, even strokes. Let the roller do the work. Apply paint to a clean, dry surface. Roll from bottom to top for smooth and even coverage.
Painting with a roller need not be a daunting experience. With the right supplies, a little practice and the right advice, you can learn to paint a ceiling, a wall, a trim, a baseboard or any of your other home projects with ease, and without streaks.
