Painting automotive plastic is important to keep your vehicle’s appearance and functionality. It can be difficult for many, but you can restore your vehicle to showroom condition with the right approach and materials.
Begin by selecting the appropriate paint for the job, then clean and prime the surface of the plastic car part before painting. Follow all of the instructions on the paint can to ensure that the paint adheres properly and dries evenly.
In this article, we’ll walk you through the steps of painting plastic car parts. So, if you want to restore or customize your vehicle, you’ve come to the right place. Let’s get started!
Painting Plastic Car Parts? A step-by-step guide
Painting plastic car parts can be daunting for many car owners, but with the right preparation and materials, it’s possible to achieve a professional-looking paint job. Here’s a step-by-step guide to help you get started.
Step 1: Gather Your Materials
Before you start painting, you must ensure you have all the supplies. This includes a plastic primer, sandpaper, paint, and a clear coat. You’ll also need a few other items, such as a clean cloth, masking tape, and a paintbrush.
Step 2: Prepare the Surface
Make sure the plastic part is immaculate before applying the paint. To remove dirt or grease from the surface, use a clean cloth and soapy water. Once the surface has been cleaned, lightly scuff it with sandpaper. This improves the adhesion of the primer and paint.
Step 3: Apply the Primer
Once the surface is prepped, it’s time to apply the primer. This will help the paint adhere to the plastic surface. Use a paintbrush to apply a thin, even primer layer to the plastic part. Allow the primer to dry completely before moving on to the next step.
Step 4: Paint the Plastic Part
When the primer has dried, you can start painting the plastic part. Begin by applying a thin, even coat of paint. Allow the paint to dry completely before applying another coat. Allow enough time for the paint to dry between coats.
Step 5: Apply the Clear Coat
After the paint has dried, apply a clear coat. This will help protect the paint while giving it a glossy finish. Apply a thin, even layer of clear coat to the plastic part with a paintbrush. Allow the clear coat to dry completely before proceeding to the next step.
Step 6: Allow the Paint to Cure
It is critical to allow the paint to cure after the clear coat has dried. This will aid in the paint’s adhesion to the plastic surface. Allow at least 24 hours for the paint to cure before exposing it to heat or moisture.
What type of Paint Will Stick to Plastic?
The right paint is essential for the best results when painting plastic surfaces. It’s important to choose a specifically formulated paint to adhere to plastic.
Generally, the best paint to choose for plastic is water-based acrylic or synthetic enamel paint. These types of paint are designed to stick to plastic surfaces, providing a durable and long-lasting finish.
When using either type of paint, it is important to use a high-quality primer to ensure that the paint will bond well to the plastic surface. Additionally, using several thin coats of paint to achieve the best results is recommended, as this will help the paint to adhere to the plastic better.
It is also important to note that when painting plastic surfaces, the room’s temperature should not be too hot or cold, as this can affect the paint’s ability to adhere to the surface.
Can the Steps for Repairing Sun-Damaged Car Paint be Applied to Painting Plastic Car Parts?
When it comes to fixing sun-damaged car paint, the easy car paint repair steps may not be directly applicable to painting plastic car parts. Plastic requires different types of paint and preparation process than metal. It’s important to research and follow specific guidance for painting plastic surfaces to ensure good results.
How Should Plastic Car Trim Be Prepared for Painting?
Preparing plastic car trim for painting is a critical step in the painting process. Ensuring the trim is properly cleaned and prepped before applying a new finish is important. Here are some of the steps to take when preparing plastic car trim for painting:
Clean the trim
Use a mild soap and warm water solution to clean the trim. Wipe away all dirt, dust, and debris from the trim with a rag. Getting into nooks and crannies where dirt can accumulate and be difficult to remove is also critical. After cleaning the trim, use a dry cloth to remove any excess moisture and help the trim dry faster.
Sand the trim
Before painting, sand the trim to ensure even coverage and a professional finish. Begin by lightly sanding the trim with a fine-grit sandpaper. Concentrate on areas with bumps, ridges, or raised portions to help create a smooth and even surface.
Sanding the trim will also help the paint adhere to the surface better and ensure a longer-lasting finish. Wear a dust mask and safety goggles when sanding to protect yourself from potential debris or particles.
Apply a primer
Before beginning any painting project, preparing the surface to achieve the best results is critical. Using a primer is critical because it provides a better foundation for the paint to adhere to.
By creating a uniform surface, primers help to fill in any small cracks, holes, or imperfections in the trim. Use a primer specifically designed for the type of paint used to achieve the best results.
Mask off areas
When painting, it is critical to mask off areas. Ensure that any areas that should not be painted are adequately masked with masking tape or another type of masking material.
Masking off areas helps to ensure a thorough and professional-looking painting job. Furthermore, it helps to protect surfaces that should not be painted from potential painting damage.
Clean the trim again
After you’ve masked off the areas, take a clean rag and wipe away any dust or debris that may have remained after sanding. Use a gentle motion and avoid using abrasive materials that could damage the trim. Once the trim is clean, you can move on to the project’s next step.
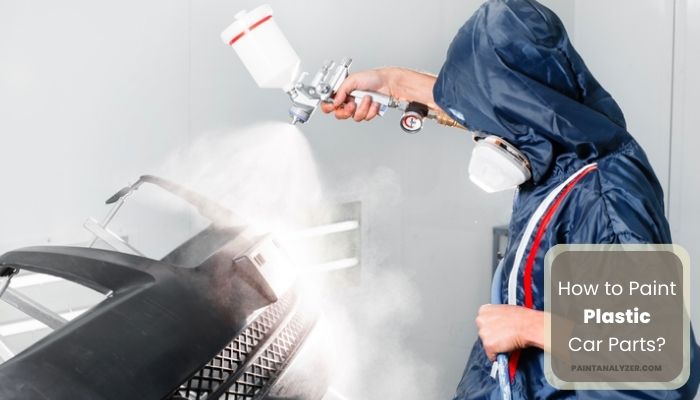
Apply the paint
Use a brush or a spray gun to apply the paint, making sure to apply multiple thin coats for the best results. Work systematically and keep the stroke length consistent to avoid runs or drips. Allow the paint to dry completely before applying a second coat. It is also recommended to sand the trim between coats lightly.
What primer is best for car plastic parts?
The best type of primer to use when priming car plastic parts depends on the job and application. If the plastic parts must be painted, an epoxy primer is a good choice because it provides extra adhesion and is highly corrosion-resistant.
A urethane primer is better if the project requires a high-gloss finish. A 2K primer is the best option for sanding parts because it is sandable and provides a great smooth finish.
When choosing the right primer, it is critical to consider the surface type of the plastic (smooth or textured) and the type of paint used. Using the proper primer to achieve the best results is also critical.
Conclusion
Painting plastic car parts can be challenging, but you can create a beautiful and durable finish with the right supplies and preparation. By choosing the right paint, preparing the plastic trim, and using the appropriate primer, you can ensure that your paint job looks great and lasts for a long time.
Of course, it’s important to keep safety in mind, too. Before painting, wear a mask, gloves, and safety glasses to avoid irritation or chemical exposure.
Following the instructions outlined in this article, you can create a new look for your vehicle to make it stand out in the crowd, whether you want to do a full paint job or touch up a few areas. Thank you for reading!