Painting doors doesn’t have to be daunting for anyone looking to do some DIY work in their home. With a few simple tips, you can produce a professional-looking paint job without brush marks that can be unsightly and detract from the overall look of a room.
A paint sprayer or a foam roller are two excellent options for painting doors without leaving brush strokes. You can create a stunning and flawless paint job that will look great for years to come with a little bit of patience and the right tools.
You should feel confident in achieving the same results in your home now that we have covered the best practices for painting your doors perfectly in this guide.
How to Paint a Door Without Brush Marks? A step-by-step guide
Painting a door can be a daunting task. It can seem impossible to achieve a professional-looking finish without brush marks. But it doesn’t have to be difficult with the right tools and patience. Here’s a step-by-step guide on how to paint a door without brush marks.
Step 1: Prepare the Door
Before you start painting, you need to take the time to prepare the door properly. Start by removing all hardware, such as door knobs, locks, and hinges. Next, fill any holes with wood filler and sand down the door to create a smooth surface. Make sure to wipe down the entire door to remove dust or dirt before applying a coat of primer.
Step 2: Apply Primer
Once the door is clean and prepped, you can begin painting. Start by applying a coat of primer. It helps ensure a smooth finish, reducing the risk of brush marks. Allow the primer to dry completely before moving on to the next step.
Step 3: Choose the paint
Now that the door is prepped, it’s time to select your paint. You’ll want to use high-quality paint with a semi-gloss finish for a professional-looking finish without brush marks.
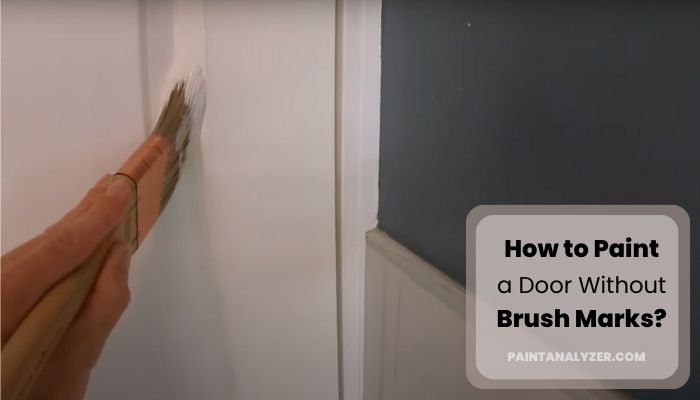
Step 4: Paint the Door
The door must now be painted. Begin with a good paintbrush and work in long, even strokes. If you’re using a roller, roll in one direction before cross-hatching in the opposite. This will reduce brush marks and give you a more even finish. Allow the paint to dry completely before applying the second coat.
Step 5: Touch-Ups
Once you’ve finished painting the door, you may need to do some touch-ups. If you notice any brush marks, take a small brush and lightly brush away the marks in the same direction you painted. Make sure to use light, even strokes.
Step 6: Sand and Apply the Finishing Coat
After the second coat has dried, sand the door with fine-grit sandpaper. This will aid in the smoothing of brush marks and the creation of a more even finish. Apply a clear coat of sealant after sanding. This will protect the paint and give it a shiny appearance.
Step: 7 re-install hardware
Once the final coat of paint and sealant is dry, it’s time to re-install the hardware. Double-check that the screws are secure before opening and closing the door.
Which is better for painting a door: a brush or a roller?
When painting a door, it is important to consider the differences between a brush and a roller. Brushes are great for achieving a smooth and even finish and can be used to create a variety of textures. They’re also ideal for painting the trim and other small details on the door.
On the other hand, rollers are great for painting larger areas and provide a much faster application than a brush. Rollers can also apply a thicker layer of paint for a more vibrant finish.
Ultimately, it comes down to personal preference, as both brush and roller have advantages when painting a door. A brush is the best choice if you’re looking for an even, smooth finish. A roller is a way to go if you’re looking for a faster application.
Does the Type of Paint Finish Affect How to Avoid Brush Marks When Painting a Door?
When it comes to avoiding brush marks when painting a door, the type of paint finish plays a major role. Matte vs flat paint differences can greatly impact the final result. Matte finishes are more forgiving and can help minimize the appearance of brush marks, while flat finishes can accentuate any imperfections.
Can I Use the Same Technique to Avoid Brush Marks When Painting Tongue and Groove Pine Walls?
Yes, you can use the same technique to avoid brush marks when painting tongue groove walls. Start by sanding the surface to create a smooth finish. Then, apply a high-quality primer and use a fine-bristle brush or a foam roller for a smooth, even coat of paint.
How Can You Get Rid of Painting Brush Strokes When Painting?
Painting can be a fun and rewarding experience, but it can also be frustrating when dealing with brush strokes. This common issue can leave your painting looking less than desired and can be difficult to fix. Fortunately, you can use simple techniques to minimize and even eliminate brush strokes in your painting.
Choose the Right Brush
The type of brush you use can make a huge difference in the quality of your painting. Natural bristle brushes are ideal for oil paints, while synthetic brushes are better for acrylics. Generally, you want to choose a brush with a medium-sized, flat head. This will help you achieve even coverage and make it easier to avoid brush strokes.
Prepare the Surface
If you’re painting on a canvas or other porous surface, preparing the surface before you start is important. You want to ensure the surface is clean and free of any dirt or dust that could interfere with the paint’s adhesion. It would be best if you also used a primer to create a smoother surface and provide a layer for the paint to adhere to.
Use Thin Coats
Applying thick layers of paint will make it difficult to achieve a smooth finish without brush strokes. To avoid this, try to use thin layers of paint. This will allow you to gradually build up the paint without leaving behind brush strokes.
Work in One Direction
When applying the paint, make sure you always work in one direction. This will help to prevent the paint from becoming too thick in one spot or creating a mottled effect. It will also help you create a more even finish with fewer brush strokes.
Use a Dry Brush
If you’re struggling to get rid of brush strokes, try a dry brush. This technique involves lightly brushing a dry paintbrush over the surface of the painting. This will help to even out any imperfections and create a smoother finish.
Clean Your Brushes
To ensure you get a smooth finish, ensure your brushes are clean and free of debris. This will help prevent any dirt or dust from mixing into the paint and causing brush strokes. Also, use enough paint on your brush to avoid streaks.
Best Roller for Painting Doors
It would be best if you had a roller that could fit into every crevice when painting doors. A tiny roller will not work. Something with a little weight is what you need. When painting doors, the Purdy Jumbo Mini Roller is a great option.
With a generous 6″ wide diameter, this roller gives you easy access to all the confined spaces. The roller’s core is sturdy steel for maximum strength and durability.
Additionally, the roller has a hollow core that simplifies loading and unloading paint. The Purdy Jumbo Mini Roller is the best option for any DIYer searching for a dependable, affordable, and durable roller for painting doors.
Conclusion
It is not impossible to paint a door without leaving brush marks. Generally, using a roller is the best option because it can provide a smooth finish and help eliminate brush strokes.
However, if you use a brush, make sure it’s the right kind, prep the door properly before painting, and use even light strokes, you should be fine. You should be able to achieve a beautiful, brush-stroke-free finish with the right technique.
So, we believe this guide has provided sufficient information to assist you in painting a door without brush strokes. Still, if you have any concerns, don’t hesitate to contact us for assistance. We’d be delighted to assist. Thank you for your time!
