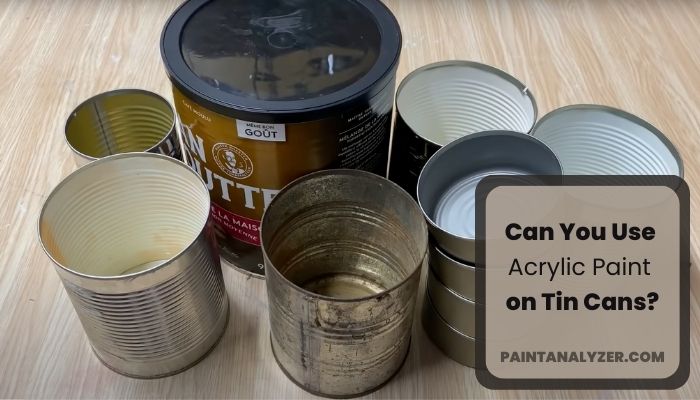
Have you ever wanted to repurpose a tin can into a decorative container or craft project but didn’t know how to go about it?
Using acrylic paint is an easy and effective way to transform tin cans into colorful and unique creations. Not only is acrylic paint safe and easy to work with, but it is also resistant to fading and peeling, making it a great choice for tin cans.
In this article, we’ll guide you through the steps for preparing and painting tin cans with acrylic paint and offer tips and techniques for achieving the best results. Whether a beginner or an experienced crafter, you’ll find something useful in this tutorial. So grab your paint, and let’s get started!
How do you apply acrylic paint on tin cans? A step-by-step guide
If you’re looking to add a unique touch to your home décor, painting tin cans is a great way to get creative! You can turn plain cans into eye-catching art pieces with simple steps. Here’s how to apply acrylic paint on tin cans:
Step 1: Preparing the tin can
Before you start painting your tin can, it’s important to prepare the surface properly. This will ensure that the paint adheres well and gives you the best possible finish. Here’s what you’ll need to do:
Clean the tin can thoroughly to remove any dirt or grime. You can use a mild detergent and a scrub brush or a commercial degreaser if the tin can has been used for storing food. Rinse the tin can thoroughly and allow it to dry completely.
Sand the surface lightly to rough it up and provide a better surface for the paint to adhere to. You can use fine-grit sandpaper or a sanding block for this step. Wipe off any dust or debris with a damp cloth.
If desired, apply a coat of primer to the tin can. This can help improve the adhesion of the paint and provide a more even finish. Use a brush or roller to apply the primer, and allow it to dry according to the manufacturer’s instructions. Once you have prepared the tin can, you’re ready to start painting!
Step 2: Choosing the right acrylic paint
Many types of acrylic paint are available on the market, and it’s important to choose the right one for your tin can project. Here are some factors to consider when selecting acrylic paint:
Opacity: Some acrylic paints are more opaque (meaning they cover well) than others. If you want full coverage on your tin can, look for a paint labeled “opaque” or “high coverage.”
Viscosity: Acrylic paint can come in different viscosities or thicknesses. Thicker paints may be easier to control, but they may take longer to dry and require more coats to achieve full coverage. Thinner paints may dry faster and provide a smoother finish, but they may be harder to control and require a more careful application.
Finish: Acrylic paint is available in various finishes, including matte, gloss, and satin. Choose a finish that suits your desired look and the intended use of the tin can.
Quality: Not all acrylic paints are created equal. Look for paints that are made with high-quality pigments and are fade-resistant. Avoid cheap or low-quality paints, as they may not provide good coverage or wear well over time.
Some acrylic paint brands that work well on tin cans include FolkArt, Apple Barrel, and Martha Stewart. However, many other good options are available, so read reviews and compare different brands to find the best one.
Step 4: Applying the paint
Now that you have your tin can prepared and your paint selected, it’s time to start painting! Here are some tips and techniques to help you achieve the best results:
Use thin layers of paint: Thick layers of paint may take longer to dry and result in drips or uneven coverage. It is best to apply paint in thin layers and give each coat enough time to dry in between to avoid these problems.
Work in small sections: It’s easier to control the paint and avoid drips if you work in small sections rather than trying to cover the entire tin can at once.
Use a foam brush or small roller: A foam brush or small roller can help you achieve a smooth finish without leaving brush marks. Dip the brush or roller in the paint and apply it to the tin can in a smooth, even motion.
Allow sufficient drying time: Acrylic paint dries relatively quickly, but it’s important to allow sufficient time for each coat to dry before applying the next one. Follow the manufacturer’s recommendations for drying times, and consider using a fan or other drying aid to speed up the process.
Step 5: Finishing touches
Once you have applied the base coat of paint to your tin can, you may want to add some finishing touches or accents to make it even more unique. Here are some ideas for ways to personalize your painted tin can:
Use stencils: Stencils are an easy and effective way to add patterns or designs to your tin can. Place the stencil on the tin can, dab a small amount of paint onto it using a foam brush or sponge, and carefully lift it away to reveal the pattern.
Add decals: Decals or stickers can be a fun way to add details or accents to your tin can. Apply the decals according to the manufacturer’s instructions, and seal them in place with a clear sealant or varnish.
Embellish with other materials: You can use various materials to add texture or interest to your tin cans, such as glitter, beads, or ribbon. Glue these materials onto the tin can using a strong adhesive and seal them in place with a clear sealant or varnish.
Step 6: Protecting the painted surface
Applying a clear sealant or varnish is a good idea to extend the life of your painted tin can and protect it from chipping or fading. Here are some options to consider:
Acrylic sealant is a clear, water-based product that is safe and easy to use on acrylic paint. It helps to protect the paint from fading, chipping, and water damage and can give the tin can a glossy or matte finish, depending on the product you choose. Apply the sealant according to the manufacturer’s instructions, and allow it to dry completely before using the tin can.
Varnish is a clear, oil-based product that can protect and enhance the appearance of painted surfaces. It is more durable and resistant to water than acrylic sealant, but it may take longer to dry and may have a strong smell. Follow the manufacturer’s instructions for applying varnish.
Mod Podge is a decoupage medium used to seal and protect painted surfaces. It is water-based and dries to a glossy finish. Brush a thin layer of Mod Podge over the painted surface and allow it to dry according to the manufacturer’s instructions.
How long does it take for acrylic paint to dry on a tin can?
The drying time for acrylic paint on tin surfaces can vary depending on the type of paint being used as well as the thickness of the coat applied. Generally speaking, professional acrylic paints take between twenty minutes to half an hour to dry to the point where finger contact will not leave a mark.
It is important to note that the drying time also depends on the environmental conditions, as acrylic paints can take longer to dry in colder temperatures and higher humidity. Additionally, it is recommended to use a primer or sealer on tin surfaces before applying acrylic paint, as it helps with adhesion and ensures that the paint will last longer.
Ultimately, the best way to determine the exact drying time for the acrylic paint on any given tin surface is to read the label on the paint and follow the manufacturer’s instructions.
What type of Paint Can You Use on Tin Cans?
Tin cans can be a great surface to paint on, and various paints can be used to achieve the desired look. Acrylic paints are a great choice for painting on tin cans, as they are durable and can be used to create various designs.
Oil-based paints are also an option, but they are more difficult to work with and may require extra preparation for long-term results. Spray paint is also a great option for painting on tin cans, as it can provide even and consistent coverage.
However, spray paints should be used cautiously, as the fumes can be dangerous, and the paint should be applied in a well-ventilated area. For the best results, clean the cans first and then use a primer before applying the paint of your choice.
Conclusion
We’ve outlined the steps for preparing and painting tin cans with acrylic paint and offered tips and techniques for achieving the best results. We’ve also discussed how to add finishing touches and protect the painted surface to extend the life of your tin can creations.
Whether you’re looking to repurpose tin cans as decorative containers, make crafts, or express your creativity, painting with acrylics is a fun and easy way to do it. So gather your supplies, let your imagination run wild, and see what amazing tin can creations you can come up with!
