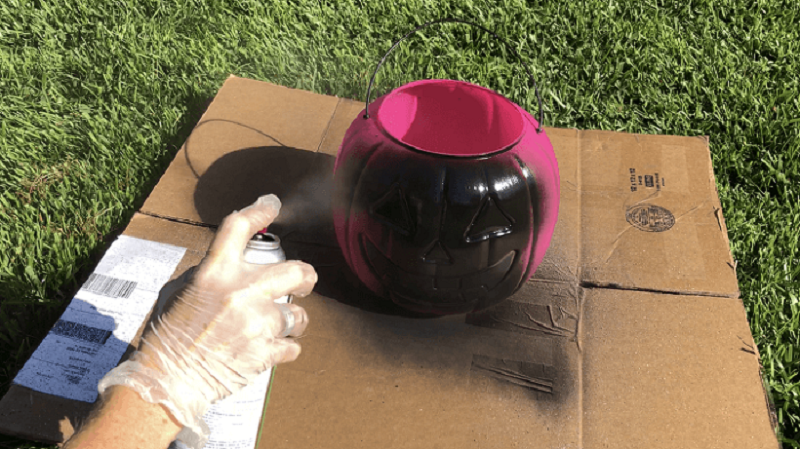
Although it’s not the most practical idea to use acrylic on plastic surfaces, it’s possible. The question of whether you can use acrylic paint on plastic is less important than knowing how you can do that.
Because even though you can apply acrylic on plastic, it will not be effective if you don’t follow the correct process.
We’ll talk about applying acrylic paint on plastic surfaces as well as the caution and preparation related to it.
The whole painting process has several steps, and the application of the paint itself is just one of them. Proper curing and surface preparation are necessary again to have a long-lasting color.

Related: Can You Use Acrylic Paint On Metal
The Problem with Acrylic Paints
We’ll talk about all the preparation and overall painting process in this guide, but it’s important to know the issue with acrylic and plastic. There is a reason why these two don’t stick with one another: surface tension.
Have you noticed that if you put a heavy object on a water surface, it drowns? But if you put something lighter instead, then it floats.
The power that’s keeping the object afloat on the water’s surface is what’s known as surface tension. The molecules on the top attract each other and keep themselves densely closed.
Like water, acrylic paint has strong surface tension. But the tricky part is the plastic.
It has surface tension almost as strong as acrylic, and when the two come close, the difference in tensions between these two allows the paint to fall off the plastic’s surface. If the surface were canvas or metal, it would be different.
A good practical example you can see yourself is by dropping some water on any plastic surface. Now try to shake the water droplets off of the plastic. It’s easy.
You can quickly get almost all the water droplets away from the surface. Plastic and water don’t attract each other for a few reasons.
First, plastic isn’t porous. Porous is just another word for the water permeable property. This property stops water from entering plastic elements.
Then the other cause is the hydrophobic nature of plastic. Because of the chemical composition of plastic and processes related to its preparation, plastic is highly water-repelling.
Painting with Acrylic on Plastic

There is a process to paint on plastic with acrylic in liquid form. It is important to follow the steps correctly to ensure the paint stays for a long time. Let us talk about the process –
Step 1: Necessary Materials and Place Preparation
Some acrylic-based chemicals emit harmful gases. Try to find a well-ventilated room with ample airflow so that those gases can’t come into contact with your nose and harm you.
Some people prefer using a mask, while some use a small fan if the area is not well ventilated. Choose whatever works best for you.
Have protective gear, especially eyeglasses, so that the paint cannot reach your eyes. It’s toxic and can cause severe damage if it comes into contact with the eyes or skin.
Keep a large piece of cloth or paper under the table or area you would be working on. The liquid paint will drop to the floor and will make a mess if you don’t cover it.
Also, keep alcohol, a sponge, a brush, and some clean clothes at your disposal. You will need them as you work.
Step 2: Plastic Surface Preparation
The plastic surface you want to work on should be completely clean. If there is even a slight amount of dirt or grease left, the painting won’t last long.
The first rule is the surface should be as plain as possible. And this would only happen when it is clean, dry, and free from grease.
How you should clean the plastic depends on how much dirt is on it. If there are visible, large dirt particles, then remove them by hand. Once you remove the large pieces, it is time to work on the minute details.
You can use any good commercially available dirt or grease cleaners if you want to. However, simple warm soap water can work just well.
Clean and scrub the plastic thoroughly. Rinse it off with tap water and dry it off with a piece of clean cloth. Let it dry completely.
Once the water has dried, rub the surface with alcohol thoroughly. This is to remove the small dirt and grease. You can also use any other cleaner, given that it has alcohol inside. It is alcohol that eliminates the small impurities from the surface.
Now it is time to create some rough areas on the plastic. We have talked before that plastic is non-porous, and it doesn’t allow liquids to reach inside.
We can’t change that but what we can do is increase the adhesive properties of the plastic. Doing this is easy; rub the smooth areas with fine sandpaper.
Sanding isn’t meant to create a rough area here; it’s just to get rid of the smooth areas on the plastic. Smoothness and acrylic paint layer don’t get very well.
This process will increase the adhesion, helping the paint layer to stick to the surface well. Once sanding is done, rewash the plastic with soapy water or cleaner.
Step 3: Primer Coating and Painting
Since acrylic can’t stick well on plastic, a primer layer is necessary to create adhesion between these two. There are many good primers available on the market.
You can use any of these if it is of good quality. It comes in spray or liquid form. Any of these is fine.
Start applying the primer from one side. Slowly cover all the surface area in a thin layer. Once one layer is complete, repeat the process a few times.
The coating doesn’t have to be thick, but it is important to have it evenly layered for the best outcome. Let the primer dry completely.
Now, use tape to mark out the area you want to paint on. You can use painter’s tape for this step. It will prevent unintended painting in areas that you don’t want to paint on.
Apply the acrylic liquid using a sponge or a brush. The coating should be somewhat thin to get the best color durability. Let it dry completely for a day. It should be safe to touch on the color afterward.
Painting with acrylic spray on plastic

This is an excellent alternative to the liquid paint application method. It is much simpler. Let us talk about it step by step.
Step 1 – Cleaning
Cleaning is similar to the cleaning step we talked about in the liquid painting step. There aren’t any differences about which we can talk.
Step 2 – Priming
Use a spray-based primer since you are doing everything in this way now. There isn’t much to talk about regarding this. Follow what’s mentioned in the manufacturer’s guide of your primer. That should be enough.
However, before you use a prime, check whether your spray paint is designed for plastic or not.
Some paints that are designed for use on plastic are made to make the colors stick to the plastic body without a need for a primer. If yours is made in this way, then you can skip this step altogether.
Step 3 – Painting
It’s a good idea to test the paint first by using it on a piece of fabric or paper. Check for the color’s intensity and thickness. Only start working if it matches your needs.
Start the spray by holding it a foot far from the object on which you will be painting. Slowly start to paint from a corner and cover all the areas.
Similar to liquid brush painting, you should do the spraying in thin and even layers. Once the color starts to look intense enough, stop spraying and let it dry. You can reapply the colors later again.
After the painting is done, let the plastic dry for a few hours.
Optional Step – Sealing
If your painted item is something that’s going to be handled often, the constant touch can break the paint layer apart.
Some people, for this reason, like to use a sealant coating on the paint layer. This curing step protects the paint from touches and makes it longer lasting.
Choose a good sealant coating and apply two or three coats of it. Give breaks in between the coating sessions to let a layer dry well. Only then give the subsequent coating.
Learn more about acrylic paints:
Final Words
Whether your goal is to cover the old plastic layer of your toy or just apply an entirely new color to a tool, using acrylic paints can come in handy.
Now that you know whether can you use acrylic paint on plastic or not, you should feel free to take any painting adventures and succeed easily. When embarking on your creative journey, the possibilities are endless. If you’re wondering, “can you paint plastic lampshades,” the answer is a resounding yes! Just ensure that you prepare the surface properly and use the right type of paint for the best results. With these tips in mind, your artistic endeavors will surely flourish.