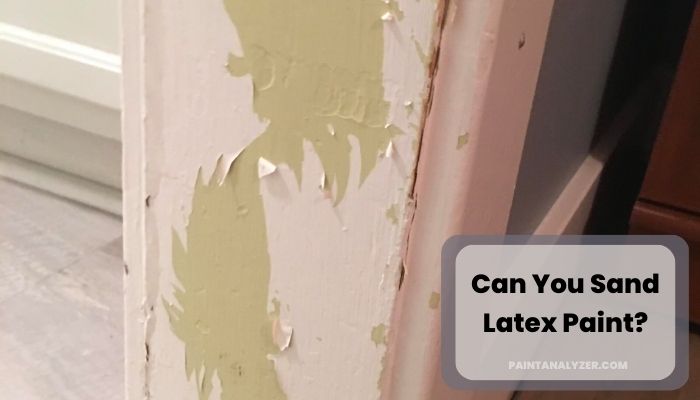
Latex paint is the most common option when painting an interior wall. It lasts for a long time, is simple to apply, and generally looks great. However, what if you need to sand down recently painted walls or want to change the way the current paint job looks. Can you sand latex paint?
Yes, you can sand latex paint. Use a fine to medium flexible sanding sponge or 120- or 150-grit sandpaper to sand fresh latex paint. Although it can take up to 30 days for latex paint to fully cure, coarser grits can be used to sand off freshly applied paint without scratching or removing it.
Keep reading if you’re interested in learning more about sanding latex paint.
How do you Sand Latex Paint? A step-by-step guide
Sanding latex paint is an essential step in the painting process, as it helps create a smooth, even surface for the new coat of paint to adhere to.
It’s a relatively simple process that requires a few essential tools and a bit of elbow grease. Here’s a step-by-step guide on how to sand latex paint:
Step 1: Gather the Right Tools
Before you begin sanding, make sure you have the right tools. Sandpaper is the most important tool and is available in various grits. A higher grit number means finer sandpaper, while a lower one means coarser sandpaper.
You’ll want to use medium-grit sandpaper (between 120 and 220 grit) for most painting projects. Additionally, you’ll need a sanding block or electric sander, a vacuum, and a damp cloth.
Step 2: Prepare the Surface
Before you start sanding, you’ll need to prepare the surface. Start by vacuuming the entire area to remove any dust or debris. Then, use a damp cloth to wipe down the surface and remove any remaining dirt. Make sure the surface is completely dry before you start sanding.
Step 3: Start Sanding
Once the surface is prepared, it’s time to start sanding. Start with medium-grit sandpaper, and use a sanding block or an electric sander for sanding the entire area. Be sure to sand in the same direction as the wood grain.
If you’re using a sanding block, you’ll need to apply light pressure to the sandpaper. If you’re using an electric sander, you’ll need to adjust the speed and pressure to ensure you don’t damage the surface.
Step 4: Vacuum and Wipe Down the Surface
After you’ve finished sanding, vacuum up any dust or debris. Then, wipe the surface with a damp cloth to remove any remaining dust.
Step 5: Apply Primer
After the surface is clean, you may now apply primer. It not only helps the new paint adhere to the surface more effectively, but it also protects it from dangers like moisture. Read the instructions on the primer’s can carefully to ensure correct use.
Step 6: Apply Paint
You are prepared to apply the paint once the primer has dried. Make sure you’re using the appropriate paint for the job and use it properly by reading the instructions on the can. Apply the paint in even, thin coats, letting each coat completely dry before moving on to the next.
Is it possible to sand semi-gloss latex paint?
Yes, you can also sand semi-gloss latex paint, though it is generally unnecessary unless you try to remove a very thin layer of paint or smooth out an imperfection. When sanding semi-gloss latex paint, it is important to use fine-grit sandpaper to reduce the risk of damage.
Once the sanding is complete, be sure to wipe away any dust from the surface to avoid having it interfere with the paint’s finish. Additionally, it is advisable to use a tack cloth or similar material to get an even cleaner finish. While sanding semi-gloss latex paint is possible, it is not recommended unless absolutely necessary.
: What Factors Should I Consider When Sanding Latex Paint?
When sanding between paint coats of latex paint, consider using 220-grit sandpaper for a smooth finish. Be mindful of the pressure applied to avoid damaging the underlying layers. Additionally, ensure the paint is fully cured to prevent any adverse effects while sanding.
How Long Should You Wait to Sand latex paint After Painting?
Painting is an important part of your home renovation project and, when done correctly, can help improve the look and feel of any room. After the painting job is completed, it’s important to wait before sanding.
For best results, waiting at least one month before sanding is recommended to ensure the paint is fully cured. This will help to protect the paint and the surface beneath it, ensuring the best-looking finish.
Additionally, waiting to sand will help prevent any issues that may occur from sanding the paint before it has had enough time to set. Taking the time to wait before sanding helps ensure a beautiful and long-lasting finish.
What happens if you recoat latex paint too soon?
If a second coat of latex paint is applied too soon after the first coat, it can cause the paint to become uneven and create a rough texture. The paint can also become brittle, leading to cracking and flaking. Furthermore, the underlying coat of paint may not have had enough time to fully cure and adhere to the surface, leading to its eventual failure.
To achieve a smooth, even finish, it is best to wait at least 4 hours before applying a second coat of latex paint. In addition, for optimal results, you should allow the first coat to dry for at least 24 hours before applying the second coat.
Conclusion
Sanding latex paint is an excellent way to achieve a smooth, even finish. Understanding the proper sanding technique and the best time to sand is critical. If you do it too soon after Painting, the paint will lift, resulting in an uneven surface. To achieve the best results, understand the entire process. Allow the paint to dry completely before sanding.
The top coat of latex paint can take up to one month to completely cure. Once the paint is completely dry, use fine-grit sandpaper for sanding the surface lightly. Always sand in the direction of the grain to avoid creating scratches and swirls in the paint.
Sand the entire surface with light and even pressure, ensuring not to press too hard. When finished, wipe the surface with a damp cloth to remove any dust or residue. So, if you want to do it yourself, follow the above steps and use the proper tools. Thank you for reading!
