Plastic sheds, such as the ones from Rubbermaid, have become a popular option for homeowners looking for outdoor storage. These do not make you break your wallet, nor will you have to put too much effort when it comes to the installation process.
Even though the factors mentioned above might make you pick plastic sheds over heavyweight counters, you need to understand that plastic does fade over time. Yes, even the Rubbermaid Sheds will develop some faded spots over time.
For that reason, the question of whether can you paint Rubbermaid sheds is pretty standard. You will find the topic in most of the art and crafts forums. But not many of those sources will have a clear answer. However, you will find that and much more in-depth information regarding the topic in this discussion. So, stick till the end.
Will Painting a Rubbermaid Shed Require Special Consideration for a Septic System?
When painting a Rubbermaid shed, it’s important to consider the impact on a septic system. Avoid washing paint brushes with septic as the chemicals can leach into the ground and harm the system. Instead, clean brushes using water-based solvents and dispose of any leftover paint properly.
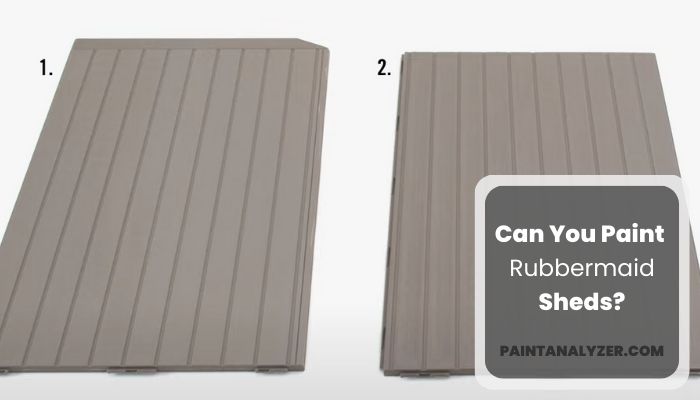
Can You Repaint A Rubbermaid Shed?
According to Rubbermaid, you should not paint their sheds. They state that the paint might not look that good, wipe off easily, or might not look good on the material. Rubbermaid even goes a step forward and states that the lifespan of a Rubbermaid shed is about ten years. And no paint will last for that long on the material.
They pointed out that they already have their sheds available in loads of color options to back their statement up. Instead of planning to repaint the unit, they suggest customers pick the color of their choice before making the purchase.
While the manufacturer seems not to have any faith in the painting capabilities of the Rubbermaid sheds, you can definitely paint them. In fact, you can choose any paint you want and get a superb result out of it. However, when it comes to making the paint last, you need to be a little creative.
We will back up the statement of Rubbermaid in the case that not all of the paint will properly adhere to plastic. The same thing goes with the primers as well. So, if you want to get the best overall result out of your painting project, you need to be a little cautious regarding what you are picking.
How to Paint A Rubbermaid Shed?
As we have mentioned, if you want to get the best possible outcome from your painting project, you need to consider the things you will work with. Also, you need to follow the right steps. Wondering what steps are we talking about? Let us guide you through:
Step 1: Get the Suitable Materials
Before you opt to paint for plastic shed, you need to get yourself a couple of materials. However, do not worry, the materials will not cost you that much. Here is the list:
- Water
- Sandpaper
- Paint Roller
- Paintbrush
- Primer
- Masking Tape
- Old Newspapers
- Paint
When it comes to the paint and primers, you will need to pick the ones that work well with the resin and plastic materials. The regular paint or primers will not work that well, and your paint will not last long if you do choose to use the regular primers or paint.
Related: How Long Does Acrylic Paint Last?
Step 2: Sand the Shed Down
Get yourself the fine-grain sandpaper and sand down the surfaces where you want to paint – wondering why you would need to sand? Well, plastic has a smooth surface.
And paint or primers will not usually stick to smooth surfaces that easily. Sanding makes the surface gain a rough texture, which will make it accept paint and primer easily.
On that note, you should get sandpaper that is anywhere from 120 grit to 220 grit for the sanding process. Those will let you finish the sanding task quickly.
However, if you do not have sanding paper such as that available, you can always use the available one.
However, remember that the more sandpaper grains, the bigger the scratches will be. So, if you have highly coarse sandpaper, you should not work on the sanding for that long of a period. A little fine sanding will do the trick.
Step 3: Rinse the Shed
Now, it will be time to grab yourself a bucket of water. Rinse down each of the areas where you have used the sandpaper.
It will get rid of any of the dirt, debris, or imperfections that the sanding process has left on the surface. You will also ensure that the surface is clean and easy to work with by rinsing it.
Talking of which, we would recommend using a pressure washer or hose for the rinsing process. It will make the task much easier, and you will be capable of completing the rinsing process much more quickly.
Also, the pressure will ensure that the surface does not have any dust or debris on the top.
But that does not mean that you will need to go out and get yourself a pressure washer. A bucket of water will do a proper job as well.
Step 4: Cover the Areas That Require Protection
At this point, your shed should look squeaky clean. Let it dry for a whole day. When the surface dries up, get the old newspapers out and get yourself the masking tape. Also, opt for a cutting tool or a pair of scissors. You will use these to cover up any areas that you do not want the paint to touch.
That said, you can certainly skip this step if you want to give the whole shed a makeover. However, if you cover some parts, such as the base, your work will look more professional and polished.
Furthermore, by covering up the areas that do not require painting, you can ensure that you do not have to go through the hassle of getting the paint off or messing up the shed.
Step 5: Prime the Shed
After you have covered up the shed, open the lid of the primer tub. We recommend using a roller because that will let you cover a large surface in a small amount of time. However, for the smaller surfaces, you would need more precision. So, you should switch to a brush for those.
Talking of which, you might think that you could skip this step and start painting without the primer. Well, the primer is here to make your paint stick better to the surface. Considering that we are painting a plastic shed, which is usually slippery, you will need every help to give the surface a higher adhering rate.
Furthermore, the primer will play an important role if you are handling a different color than your shed. The primer will hide the original color and make the new color pop out more.
Some of the primers are tinted with white color. Those will do a proper job of hiding the original color. You will basically have a blank canvas to work with if you can adequately spread the primer around on the surface.
Related: Can You Mix Acrylic Paint with Oil Paint?
Step 6: Paint the Shed
Leave the primer to dry. Depending on the primer, it can take anywhere from a couple of hours to two days for the primer to completely dry. When the primer is about to dry up, wash your paint roller and paintbrushes.
By washing them, you will ensure that the paint does not get mixed with anything and eventually get a smooth overall finish.
On that note, you can use the same paintbrush and rollers that you used for priming the surface; make sure to wash them first. That way, you don’t have to wash too many brushes after completing the project.
Nonetheless, just as in the previous step, use the paint rollers to cover as much area as possible. However, do not finish the entire step with the roller. Instead, switch to your paintbrush and work on the smaller areas. The strokes from the paintbrush will make the surface retain more details and will eventually make it look great.
That said, ensure to paint a couple of layers on the surface to make the paint come through properly. Without layering the paint, the color might look a bit dull and lifeless. But let the previous layer dry properly. It should take about two hours or more for the coats to dry.
Related: Can You Mix Interior and Exterior Paint?
Step 7: Remove the Masking Tape
The last and final step is to remove the masking tapes and newspapers. But before you do attempt to remove them, you should let the coats dry up properly. Once the coats are bone dry, carefully remove the newspaper and masking tape and enjoy your fully renovated Rubbermaid shed.
Final Words
Now, if anyone asks you if can you paint a resin shed or not, you can certainly give the proper answer. However, do remember to pick the right paint and primer before attempting to give your Rubbermaid shed a new look. The wrong paint and primer will ruin the overall look of your shed.