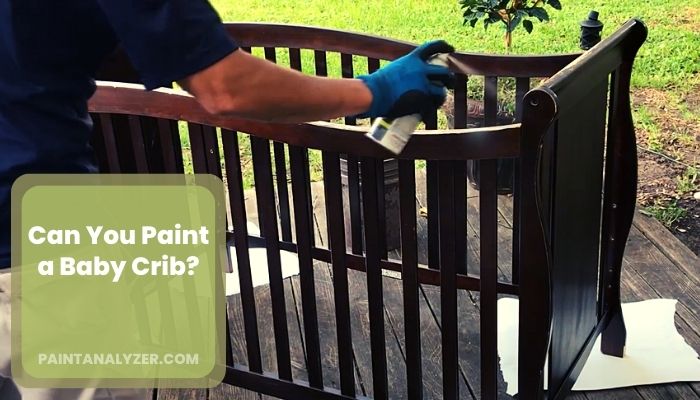
When you become a parent, you want to do everything you can to ensure your child has the best possible start in life. That includes creating a safe and comfortable nursery for them to sleep in. But if you’re not much of a handyman (or woman), you might be wondering if you can paint a baby crib DIY.
The answer is yes, you can! But there are a few things you need to keep in mind. You need to ensure that the paint you use is non-toxic and safe for your baby and that it is properly applied so that it will not chip or peel off easily.
How to Paint a Crib White Without Sanding?
When you want to achieve a beautiful, crisp white finish on your baby’s Crib without any sanding, then this guide is for you! We’ll show you how to prep and paint a crib white without any sanding required, resulting in a smooth and flawless finish.
Here’s what you’ll need:
- White Paint
- Paintbrush
- Painter’s tape
- Drop cloth
- High-grit sandpaper (optional)
Step 1: Prep the Crib
Start by giving your Crib a good cleaning with a damp cloth. If there are any rough spots or splinters, you can sand them down with high-grit sandpaper. Once the Crib is clean and smooth, tape off any areas you don’t want to be painted, such as the mattress supports.
Step 2: Paint the Crib
Now it’s time to start painting! Begin by painting the sides and front of the Crib with white paint. If you’re using a brush, be sure to use long, even strokes for the best results. Once the sides and front are painted, move on to the legs and other details.
Step 3: Let the Crib Dry
Once you’ve finished painting the Crib, let it dry completely before moving on to the next step. This will usually take a few hours, but it’s essential to be patient and let the paint dry completely to avoid any smudging or smearing.
Step 4: Apply a Second Coat (Optional)
If you want a really crisp, white finish on your Crib, you can apply a second coat of paint. This step is completely optional, but it’s a good idea if you’re looking for that perfect finish.
And that’s it! Just four easy steps, and you’ll have a beautiful white crib that’s perfect for your nursery.
What paint Can you Use to Paint your Baby’S Crib?
There are a few things to consider when choosing Paint for your baby’s Crib. Cause every parent wants their child to be comfortable as well as safe.
Type of Paint
When choosing paint for a nursery, it is essential to select a product that is non-toxic and water-based. This will help to protect your child from any harmful chemicals that could be present in other types of paint. Water-based paint is also easier to clean up in case your little one happens to get into the paint supplies.
Color of the Paint
You want to choose a light color for your baby’s nursery so that it will be easy on your baby’s eyes. White or off-white are always good choices. Light colors will help to create a calming and serene environment for your little one.
The finish of the paint
When choosing a finish for your Crib, you’ll want to consider both practicality and aesthetics. A glossy finish is easy to clean and disinfect, making it a great choice for areas where food preparation takes place. Plus, it adds a touch of luxury to any space.
Is Lullaby Paint Safe for Crib?
As a new parent, you want to do everything you can to create a safe and healthy environment for your baby. That’s why choosing the right paint for your nursery is so important. Lullaby Paint is a low-VOC (volatile organic compound) paint brand specifically designed for use in nurseries and other children’s rooms.
Low-VOC paints are safer than traditional paints because they emit fewer harmful chemicals into the air. It also offers a wide range of colors, so you can find the perfect shade to match your nursery décor. And because it’s low-VOC, you can feel good about using it in your baby’s room.
Are Chalk paint safe for babies?
When you’re looking for safe and non-toxic paint for your baby’s nursery, chalk paint is a great option! It is made from natural ingredients like limestone and clay, so it’s completely safe for your little one.
Plus, the matte finish of chalk paint gives your nursery a warm and cozy feeling. It is also very easy to clean, so you won’t have to worry about your baby getting paint on their clothes or toys.
Can you Paint a Crib With Regular Paint?
You can paint a crib with regular paint, but it is not recommended. Regular paint is not as durable as specially-made furniture, so it is more likely to chip and peel over time. Also, regular paint may not be safe for your baby if they chew on the Crib.
If you do decide to paint a crib with regular paint, make sure to use a non-toxic variety and carefully sand and prime the surface first.
Should a crib be sanded before painting?
One of the most important questions to answer when preparing to paint a crib is: do you have to sand it first? The short answer is yes. You should sand your Crib before painting it. This will give the new paint job a smooth, even surface to adhere to and will help avoid any peeling or chipping down the road.
Here’s a more detailed look at why sanding is so important and how best to go about it. Why sanding is important Whether you’re painting an old crib that’s seen better days or a brand new one, sanding is key to ensuring that your paint job looks its best.
Sanding smooths out the surface of whatever you’re painting, creating an even base for the new paint. This is especially important with cribs, which often have intricate designs carved into them. Without sanding, these details can become lost under several layers of paint – not exactly what you want when trying to achieve a professional-looking finish!
How to Sand a Crib before Painting?
Now that we know why sanding is so important let’s talk about how to actually do it. You’ll want to start with medium-grit sandpaper and work your way up (or down) from there, depending on the condition of your Crib.
If the wood is in good shape with few imperfections, starting at a higher grit will suffice; if it’s rougher and damaged, begin with the lower-grit paper. Whichever route you choose, be sure to always move in the same direction as the grain of the wood – going against it can cause damage that will show through your new paint job no matter how many coats you apply.
How Should a Crib Be Prepared for Painting?
You’ll need to take a few extra steps to ensure a smooth, safe finish. Here’s how to prepare a crib for painting:
- Remove all hardware and any other removable parts. This includes drawer pulls, knobs, hinges, and any other small pieces. Be sure to label each piece as you remove it so you can quickly put it back in the right spot later.
- Sand down the entire Crib. This will help the paint adhere better and create a smooth surface for painting.
- Vacuum the sanding dust off of the Crib.
- Wipe down the Crib with a damp cloth to remove any remaining dust.
- Prime the Crib. This step is essential, as it will help the paint to last longer and look better.
- Once the primer is dry, paint the Crib with your desired color. Be sure to use paint that is safe for use on baby furniture.
Restoring a baby crib on your own
Is the Process of Painting Formica Similar to Painting a Baby Crib?
When it comes to painting Formica and a baby crib, the process is not quite the same. Painting Formica requires following an expert Formica cabinet painting guide to ensure the best results. On the other hand, painting a baby crib involves using non-toxic paint for safety reasons.
Conclusion
Parents who want to add a personal touch to their baby’s nursery may want to consider painting the Crib themselves. This can be done relatively easily in just a few simple steps. Gather all of the necessary supplies, including paint, primer, sandpaper, and painter’s tape.
Next, remove any removable parts from the Crib and sand down any rough areas. Once everything is prepped, begin painting with light coats and allow each coat to dry completely before adding another. When finished, reassemble the Crib and enjoy your handiwork!