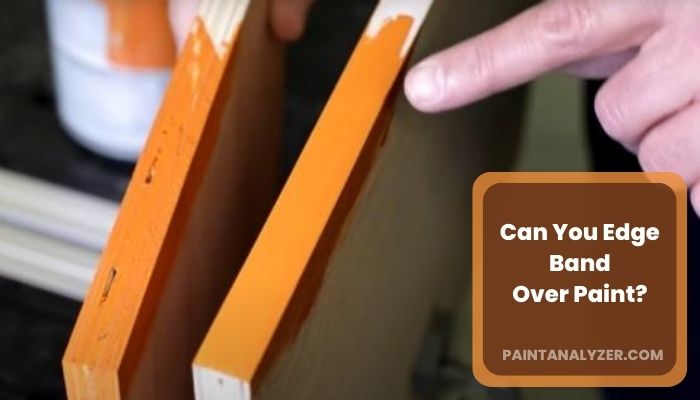
Edge banding is a great way to create a finished look on raw wood edges. The process of edge bonding includes bonding a strip of material to the edge of a board. Whether you’re painting cabinets or creating a new accent wall, you may be wondering if you can edge band over paint.
The short answer is yes, you can edge band over paint but you must make sure that the surface of your cabinets is completely smooth before you start. Sometimes, paint can make it difficult for the edge banding to adhere properly, so it’s important to take the necessary precautions.
Will Edge Band Stick to Paint?
Whether or not edge banding will stick to paint depends on the type of paint and the type of edge banding being used. Some types of paint, like oil-based paint, can cause the adhesive on the edge banding to break down, making it less likely to stick. Other types of paint, like latex paint, can actually help the adhesive on the edge banding to adhere better. It is always better to consult with a professional to determine what type of paint and edge banding will work best for your project.
You must make sure the paint is completely dry before applying the edge banding. If the paint is still wet, it can cause the adhesive to not bond as well.
Note that edge banding tape is not designed to adhere much to paint, and as a result, it is not recommended to use it in this manner. If you are looking for a way to create a seamless, finished look on painted surfaces, we recommend using trim or molding instead of edge banding tape.
How to Apply Edge Band Over Paint?
If you’re looking to add edge banding to a painted surface, there are a few things you’ll need to keep in mind.
Dry and Clean Surface
First, you’ll need to make sure that the paint is completely dry and that the surface is clean. Any dust or debris on the surface can prevent the edge banding from adhering properly.
Get A Good Quality Adhesive
Once the surface is prepared, you can start applying the edge banding. It’s important to use a good quality adhesive and to apply it evenly.
Paintbrush or Roller
Use a roller or paintbrush while applying the edge band. It will smooth out any bubbles, wrinkles, or creases to apply a thin layer of adhesive to the back of the banding material.
Banding machine and Guide
An edge banding machine will help you apply the edge banding evenly and smoothly. You’ll also need a guide to help you get a straight, even edge. Remember, aligning the banding material with the edge of the painted surface is important.
Heat Gun or Hair Dryer
Once the edge banding is in place, you can use a heat gun or hair dryer to lightly heat the adhesive and help it to set on the painted surface.
Getting Rid of the Excess
Use a sharp utility knife to trim the excess banding material. Banding material can be very sharp so take extra care while cutting off the excess. If possible, use a cutting board or other surfaces to protect your countertop or work surface.
what are the Alternative Ways to Edge Band?
There are also some other ways that be good alternatives to edge banding. Each of them has different advantages and disadvantages of its own. We will discuss some of them here.
Using Wood Filler
Wood filler is a common material used in woodworking and carpentry. This is a type of putty used to fill in holes, cracks, and dents in wood surfaces. Wood filler is available in different colors to match the wood it will be used on, and can be either oil-based or water-based. Both water-based and oil-based formulations have their own advantages and disadvantages.
To apply wood filler, the first thing to do is to ensure that the area to be filled is clean, dry, and free of any loose debris. This will help to ensure a strong and durable repair of the wood.
Then apply the filler to the area using a putty knife or similar tool, taking care to smooth it into the cracks and crevices. Once the filler is in place, allow it some time to dry completely before sanding it smooth.
Tongue and Groove Method
This method is a simple way to achieve a tight, professional-looking finish on your plywood project. The tongue and groove method is a simple way to cover the edge of the plywood. This method uses a strip of wood that is nailed or screwed to the edge of the plywood.
The strip of wood has a groove cut into it that is the same width as the plywood. A piece of trim is then placed over the strip of wood and nailed or screwed into place as the final step.
Trimming Solid Wood
Edging is one of the most important aspects of any woodworking project and it can make or break the overall look of the piece. Solid wood trim is one of the best options available there for edging. This is extremely durable and looks great once properly finished.
To get a smooth, clean look when doing solid wood trim for edging, use a sharp chisel and a light touch. First, mark the depth of the trim you want with a pencil. Then, using the chisel, cut along the line you’ve drawn, being careful not to go too deep. Once you’ve cut the entire length of the trim, use a sanding block to smooth out the edges. Finally, apply a finish of your choice
Why You Should use Edge Band Over Your Painted Cabinets?
If you’re painting your cabinets, you may be wondering if you should add edge banding. Edge banding is a strip of material that’s applied to the edges of cabinets, usually made of wood or laminate.
There are many reasons to choose edge bands over painted cabinets. Edge band provides a cleaner, more finished look and is more durable than paint. It is also easier to clean and maintain and can be wiped clean with a damp cloth.
If you wish for cabinets with a neater appearance, you must try edge bands on your cabinets. Also, the edge band is extremely durable and resists chipping and peeling. to protect the edges from chipping or damage.
Make Edges Look Great on Plywood Projects
what are some Ways of Edge Banding Plywood?
Looking for a way to give your plywood project a professional and finished look, then edge banding is the answer. Edge banding is simply a strip of material (usually wood veneer) that is applied to the exposed edges of the plywood. This gives the project a clean and polished appearance, as well as protects the edges from any possible damage. There are two different ways to apply edge banding:
Adhesive-backed Edge Band
Adhesive-backed edge banding is a type of veneer that is used to cover the exposed edges of plywood or particle board. It is available in a variety of colors and finishes and can be purchased with the adhesive already applied to one side. Edge banding is typically applied with a heat gun or iron and then trimmed flush with the edge of the substrate. If using adhesive-backed banding, just peel off the backing paper and press it into place.
Edge Banding Iron-On
Iron-on edge banding has no adhesive, so you’ll need to use an iron to heat up the material and melt it onto the plywood edge. This method takes a little longer but results in a stronger bond. Once you’ve decided which method you want to use, simply cut the edge banding strips to size and attach them around all four sides of your plywood piece.
For iron-on banding, place the strip on top of the plywood edge and run a hot iron over it until it’s melted onto the surface. Use even pressure and strokes until the entire length is fused together.
Will Using Base Paint without Tint Affect the Ability to Edge Band Over Paint?
Yes, using base paint without tint will affect the ability to edge band over paint. Tinted paint creates a more uniform and consistent surface, allowing for better adhesion of the edge band. Without tint, the paint may not have the necessary grip for the edge band to adhere properly.
How to Finish Edge Banding Using Adhesive Backed Tape?
Giving your furniture or cabinets a professional and polished look has no other better way than applying edge banding. This is the process in which a strip of material (usually wood, plastic, or metal) is applied to the exposed edges of a piece of plywood or MDF. This gives the appearance of a solid-wood border around the edge of the piece and can help protect the edges from damage. Here’s a quick overview of how to finish edge banding using adhesive-backed tape:
Measure Accordingly
Measure the length of the area you need to edge and cut your strips of edging material to size using a sharp knife or a pair of scissors. Make sure to allow for about 1/8″ overlap at each end. Adding extra few inches to your measurement would be helpful to account for any curves or corners.
Take Enough Adhesive-Backed Tape
Apply strips of double-sided tape to the back side of your edging material, being generous with the amount of tape you would use. You would definitely want it to be nice and sticky so that it will adhere well to your surface.
Align in A Proper Way
Starting at one end, align your edging strip with the edge of your plywood or MDF board. Press the strip into place, making sure that it is flush with the edge of the board. Use a hammer or another blunt object to gently tap the strip into place if necessary.
Put Even Pressure
Use even pressure as you adhere the strip all along its length until you reach the other end. Make sure that the strip is lying flat against the surface and that no bubbles or wrinkles are there.
Edge Trimmer
Use an edge trimmer (a special router bit) to trim off any excess edging material that extends beyond the surface of the board. You can also use a sharp utility knife and straightedge for this step if you don’t have an edge trimmer.
Conclusion
You have already come to know by now that you can edge band over paint. But there are some facts you must consider.
Remember that the edge band is largely a decorative finish and not a structural element. While it can provide some stability and support to the edges of your furniture piece, its primary purpose is to give the furniture a polished, finished look.
The edge banding material that you want to use must be compatible with the overall finish of your piece. When choosing edge banding for your project, be sure to select a product that is compatible with the paint you will be using. This will ensure a smooth, consistent finish and prevent any peeling or chipping.
Also, you should always test the edge band on a piece of scrap wood before you apply it to your project. This will ensure that the edge banding is compatible with the wood and will give you the best possible results.
